In the ever-evolving world of crafting and DIY projects, finding the right tools can make all the difference in bringing your creative visions to life. A recent YouTube video has caught the attention of crafting enthusiasts and hobbyists alike, showcasing the unboxing and first project with the $499 Brother Skitch PP1 home embroidery machine. Felicia’s ’embroidery is finally made easy with Brother Skitch’ video is a journey of discovery and inspiration as she explores the contents of this affordable yet capable tool for anyone considering adding an embroidery machine to their crafting arsenal.
Like working with heat transfer vinyl or other vinyl materials, Skitch allows you to create personalized designs. Whether customizing a garment like a shirt, hoodie, or a cloth bag, or adding a personal touch to home décor like towels and pillows, you have to admit the texture, colors, and dimensionality of embroidery look more upscale than the same personalized creations made with vinyl. While heat transfer vinyl typically survives up to 50 wash and dry cycles before cracking or peeling, embroidery lasts longer. This is why hotel chains, restaurants, physicians offices, golf courses, resorts, and most professional businesses use embroidery rather than heat transfer vinyl. Skitch allows home crafters an affordable entry point into embroidery.
It’s important to know that Brother Skitch PP1 is not a sewing machine. It only offers the embroidery function. According to Brother’s website, Skitch is a single-needle embroidery machine with an embroidery speed of 400 SPM. There are other sewing/embroidery machines in the same price range, including the Brother SE700 for about $550.
Unboxing the Brother Skitch
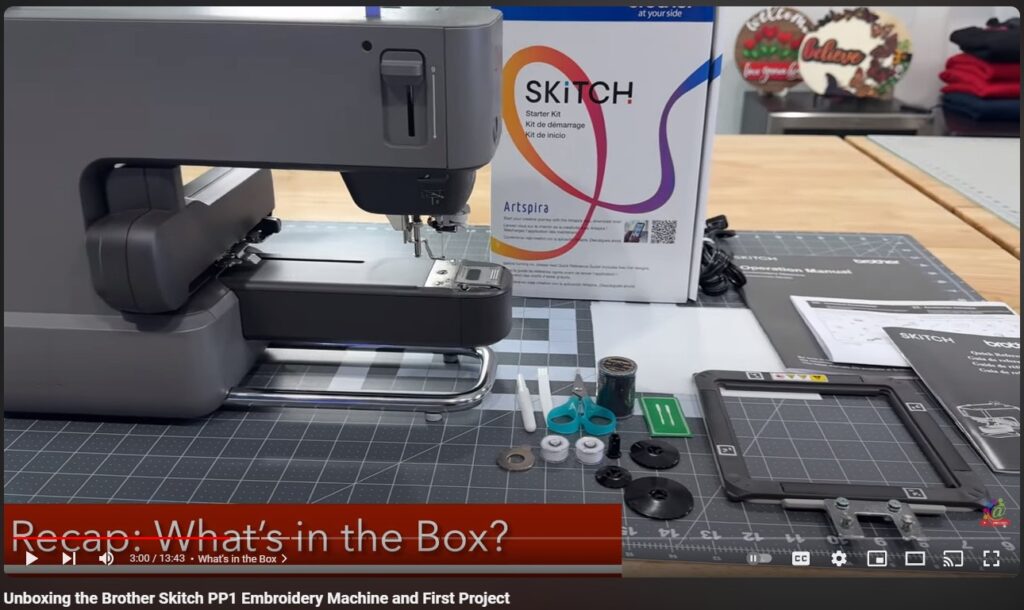
The video opens with the excitement of the Amazon delivery and the anticipation of unboxing the Brother Skitch. Felicia carefully unveiled each component, providing a detailed look at exactly what comes in the package, and what didn’t. From the sleek design of the Skitch machine in it’s cool grey color, to the assortment of accessories, the unboxing sets the stage for an exciting creative adventure. The Skitch Single-Needle Embroidery Machine includes a Quick Reference Guide, scissors, cleaning brush, seam ripper, needle set, 2 pre-wound bobbins, a disc-shaped screwdriver, 4 spool pressers (mini, small, medium, and large), a 4″ x 4″ (100 mm x 100 mm) magnetic frame, electric cord, embroidery thread (black), felt, backing material. It’s important to note that a 3×3″ hoop is also available and sold separately as an accessory, costing upwards of $70.
Overview of Brother Skitch PP1 and its Features
Felicia explored the features of the Brother Skitch, emphasizing its compact design, Bluetooth connectivity, and user-friendly Artspira app interface. Unlike Brother’s other embroidery machines, there is no screen on the Skitch, so all connections must be made via the Artspira app, and only with an iOS or Android device. We could not find an app for Apple or Windows based computers.
Felicia offered a glimpse of the various functions and capabilities that make this crafting tool a valuable addition to any creative workspace. She provides a step-by-step guide to setting up the Skitch, which we found to be intuitive and remarkably easy, even for beginners.
Also, the Bluetooth setup connectivity was flaky at times. Felicia simply removed the device from her Bluetooth connections, re-added it immediately afterwards, and it connected instantly. Since the controls are app-based, all her projects remained saved and completely intact.
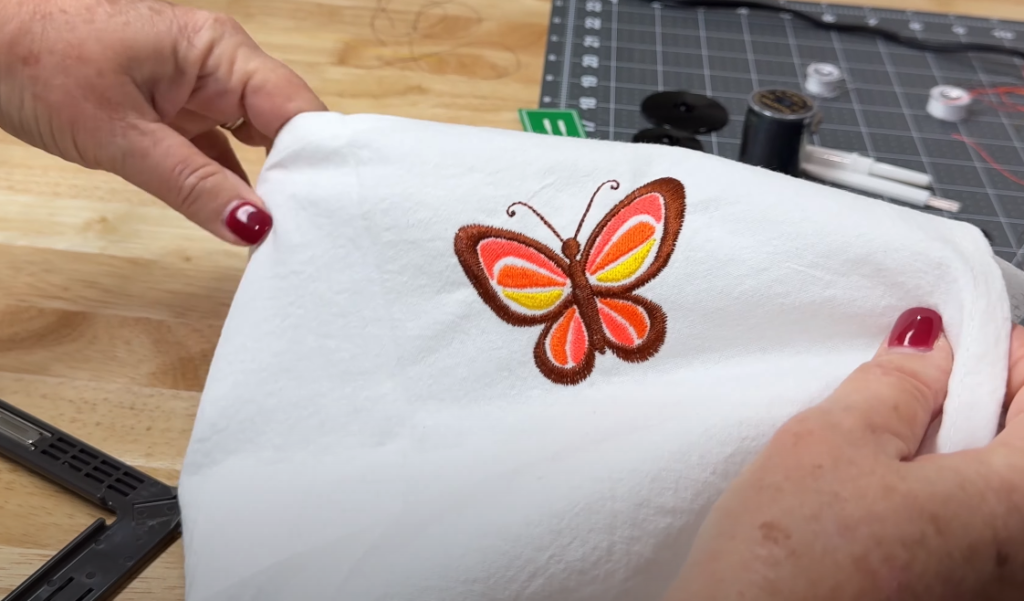
With the Brother Skitch ready to go, using the free version of the Brother Artspira app, again, only available for iOS or Android devices, Felicia selected a simple demonstration project using one of the pre-loaded butterfly designs. She loaded her alternative bobbin and thread, connected her iPhone to Skitch, and sent the design over wirelessly. Changing the thread was easy, following the step-by-step numbers printed on the Skitch machine. The design sewed out perfectly.
Artspira Pro Digitization Test
Felicia’s next test project was digitizing a hand-drawn design. Digitization is the process of converting an image into a digital embroidery file format that an embroidery machine can understand and work with. You can’t just upload a JPG, PNG, or SVG into an embroidery machine because it does not contain the information needed to determine where the stitches begin, end, or their location. Digitization converts an image or design to an embroidery file with all that information, denoted for Brother embroidery machines with a PES extension. Until now, image digitization was limited to professional third-party vendors, or very expensive and cumbersome software packages. We use and fully endorse Zdigitizing.com for digitization of our professional embroidery designs, and they’re always perfect. However, for more simple designs, like Felicia’s hand-drawn Mr. Cloudy, the Artspira app is capable of creating a compatible digitized embroidery file.
There is one gotcha. Yes, the free version of Artspira can digitize your images. But only the paid, professional version at $12.99 a month will allow you to export the digitization file you made for use with all Brother embroidery machines. The pro version of Artspira also includes other features, including an expanded commercial-use art library and several additional fonts. There is a one-month fully functional free trial, so definitely take it for a test drive. You can always go back to the free version.
Yes, the free version of the Artspira app will allow you to import and embroider externally digitized PES designs. There is some sort of monthly limitation however, and we’re not sure how that works.
All things considered, Mr. Cloudy came out surprisingly well! Felicia learned designs with fill stitches and an outline may result in embroidery with a slight gap between the fill and the outline if there isn’t sufficient stabilization. Thanks to Janey, who recommends as a general rule, using cutaway stabilizer for items you’ll wear and wash. Adding a layer of tearaway under the cutaway almost always never hurts, and she recommends it especially if you’re using poly no-show mesh cutaway. For things like towels, you can usually just use a medium tearaway. Felicia demonstrated this in the following video.
What Did We Think About Skitch?
The Brother Skitch PP1 impressed Felicia and Fresh with its precision and versatility. Using imported professionally digitized designs in subsequent projects, Skitch allowed them to sew out very intricate designs up to a maximum size of 4×4″, which is large enough for almost any hat, shirt, or bag with personalized embroidery. For slightly larger designs up to 5×7″, the Brother SE1900 offers this capability (along with sewing functionality) for about $1100. If both sewing and embroidery are necessary to achieve your creative embroidery goals, Brother offers the Brother SE700, which also tops out at 4×4″ embroidery, for about $550. These are both easily available via our Amazon affiliate links (thanks for your support).
- Direct Amazon link for Skitch PP1: https://amzn.to/4c2bnk3
- Direct Amazon link for SE700 Sewing and Embroidery Machine: https://amzn.to/3P9JnBg
- Direct Amazon link for SE1900 Sewing and Embroidery Machine: https://amzn.to/49BneUX
- Direct link for professional digitization by ZDigitizing (save up to 50% on your first order!): https://zdigitizing.com/product-category/services/?coupon-code=family50off
From paper and fabric to vinyl and leather, the Skitch opens up a world of possibilities for creators looking to add a unique and more upscale flair to your projects. Brother’s Skitch PP1 is more than just a crafting tool – it’s a gateway to limitless creative expression. Whether you’re a novice or experienced embroiderer, Skitch and its capabilities may elevate your DIY projects to new heights.