Copyright © 2025 by Felicia Fresh. All rights reserved. No part of this publication may be reproduced, distributed, or transmitted in any form or by any means, including printing, screen printing, copy/pasting, photocopying, recording, AI voicing, and/or other electronic or mechanical methods without the prior written permission of the publisher, except in the case of brief quotations embodied in critical reviews and certain other noncommercial uses as permitted by United States copyright law. For permission requests, please write to the author.
DISCLAIMER
The information contained in this guide is for educational and informational purposes only and is not intended as professional advice. While the author has made every effort to ensure the accuracy and completeness of the information shared, she assumes no responsibility for errors, inaccuracies, omissions, or any other inconsistencies herein. Laser cutting and engraving machines are powerful tools that pose inherent risks, including but not limited to fire, eye injury from laser radiation, and exposure to potentially toxic fumes. The reader is solely responsible for their own safety and for the safe operation of their equipment. Always follow all safety precautions and operating instructions provided by the manufacturer of your specific machine. The author shall not be held liable or responsible for any personal injury, property damage, or any other harm or loss that may result from the use of the information contained in this guide. Any mention of business ideas, strategies, or potential for profit is for illustrative purposes only and does not constitute financial or legal advice. The author makes no guarantees regarding financial outcomes and is not responsible for any business losses or successes that may result from applying the information in this book. The reader is encouraged to seek professional advice before making any financial or business decisions.
Table of Contents
- Your Creative Journey Starts Here
- What is a Diode Laser? (The Simple Version)
- How Does It All Work? From Screen to Creation
- Choosing the Right Machine for You
- Getting Started With Confidence
- Your Next Steps on the Laser Path
1. Your Creative Journey Starts Here.
If you’re like everyone else, and have been bombarded with ads on social media touting the world of diode laser cutting and engraving, but you still feel a little intimidated by the technical side of things, then you have officially found your happy place!
This guide is your friendly, beginner-focused roadmap. It’s designed to walk you through the essentials of what a diode laser is, how it performs its magic, exactly what it can (and can’t) cut and engrave, how to choose the perfect machine for your creative ambitions, and how to get started with total confidence.
If you’re making your way here from the wonderful world of vinyl cutting machines, you’ll find some familiar territory. Think of a laser as your favorite cutting machine’s super-powered cousin but lasers bring incredible new enhancements to the table. You can still work with materials you love, like paper and cardstock, and even some types of heat-transfer vinyl (HTV).
A quick but important note: when working with lasers and vinyl, always check with your supplier to ensure your vinyl is “laser-safe,” as some vinyls can release harmful fumes.
A diode laser engraver truly unlocks a universe of creative potential, giving you the power to transform everyday items into personalized treasures, craft unforgettable gifts, and even launch that small business you’ve been dreaming of. The amazing variety of products you can make is really only limited by your imagination and the wide range of materials a diode laser can work with.
A Menu of Material Possibilities
Welcome to the grand tour of your new creative workshop! We’ve prepared a veritable smorgasbord of materials just waiting for your artistic vision. Think of this tool as your magic wand, ready to transform a vast palette of surfaces into personalized treasures. Whether you’re building from scratch or adding a touch of custom flair, your creative journey starts now.
For your main course, let’s explore the materials you can both precisely cut and intricately engrave. Unleash your imagination on the timeless warmth of wood, from sturdy plywood and versatile MDF to rich, solid hardwoods. You can slice through vibrant, opaque acrylics (darker shades work best) to create glossy, modern marvels. Dive into the world of textiles by etching detailed patterns onto supple leather and delicate fabrics, or craft crisp, elaborate designs from humble paper and cardboard. With these materials, you can sculpt intricate shapes, build complex projects, and bring fully-formed ideas to life.
But the creative feast doesn’t stop there! An entire collection of materials is waiting to be embellished with your unique designs through engraving. You can etch your mark onto the earthy authenticity of slate for a rustic, elegant finish. Add a permanent, professional touch to the gleaming surface of coated metals, such as anodized aluminum. With just a touch of special preparation, you can even bestow the sparkling elegance of glass with custom artwork. This power of personalization extends to various other plastics, allowing you to transform nearly any object into a one-of-a-kind masterpiece.
A Showcase of Creative Ideas
To get your creative gears turning, here is a list of popular and profitable projects you can start making right away.
For a Beautiful Home
- Personalized Coasters: Design and engrave elegant patterns, family names, or witty quotes onto wood, slate, or cork coasters.
- Custom Cutting Boards: This is a fan favorite! Immortalize handwritten family recipes or add beautiful monograms to wooden cutting boards.
- Wooden Signs: From charming “Welcome” signs for your front porch to rustic decor for your living room, the possibilities are endless.
- Stunning Wall Art: Create breathtaking, multi-layered 3D wood art, engrave cherished photos directly onto wood, or cut out intricate stencils for your next paint project.
- Acrylic LED Lamps: Engrave a design onto a clear acrylic sheet, pop it into an LED base, and watch your art glow.
For Unforgettable Gifts & Accessories
- Unique Jewelry: Design and cut beautifully detailed earrings, pendants, and bracelets from wood or acrylic.
- Leather Goods: Add a touch of class by personalizing leather wallets, passport holders, journal covers, and keychains.
- Custom Pet Tags: A fun and fast project! Engrave pet names and contact info onto durable anodized aluminum or wood tags.
For Thriving Small Businesses & Events
- Professional Business Signage: Create eye-catching logos and signs that make your business or craft fair booth stand out.
- Memorable Promotional Products: Engrave your company logo onto pens, keychains, or coasters for clients that they’ll actually use.
- Elegant Wedding & Event Decor: This is a massive and rewarding market! Craft everything from wooden invitations and cake toppers to table numbers and personalized party favors.
With these ideas as your launchpad, you can combine them with your unique creative spark to make your diode laser an incredibly versatile and fulfilling tool.
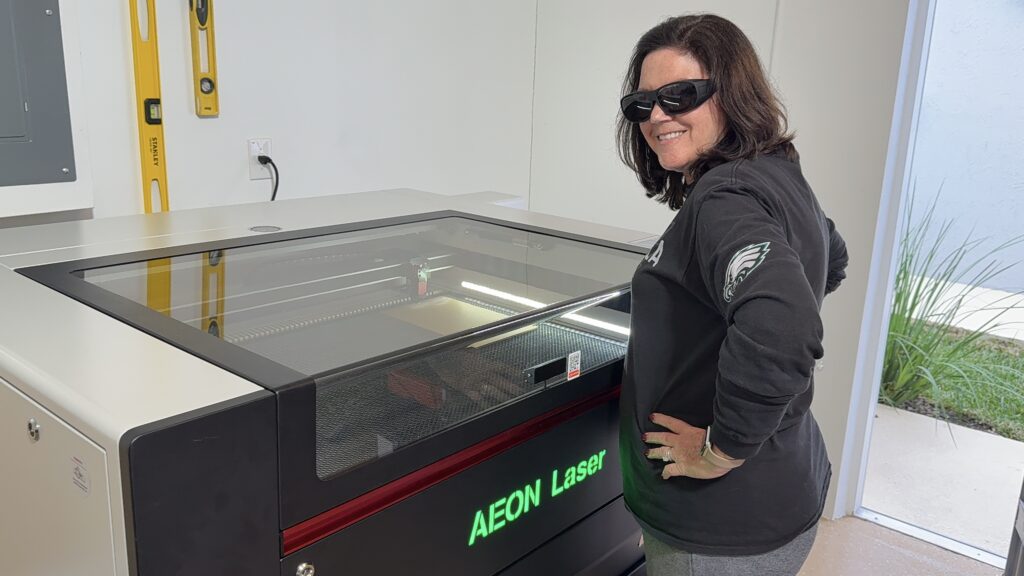
Meet Your Guide: Felicia!
Hi, I’m Felicia! I’m so thrilled you’re here. I started my laser journey exactly where you are now—overflowing with curiosity but not quite sure where to even begin. I’ll never forget the day I finally dove in and bought my first diode laser; I was absolutely blown away by how user-friendly it was and how it instantly elevated my crafting from a fun hobby to something that looked truly high-end.
From creating personalized gifts that left friends speechless to producing high-end, store-quality products, I’ve seen with my own two eyes what is possible with these amazing machines, even for a total beginner.
That experience lit a fire in me, and it’s why I’m the creator and host of “Craft with Felicia,” the go-to YouTube resource for fellow hobbyists and aspiring entrepreneurs in the diode laser world. My passion is making beautiful, handmade items, and I discovered that laser technology was the secret ingredient to unlocking a whole new dimension of creativity and professionalism in my work. I founded my channel with a simple but powerful mission: to demystify laser crafting and make it wonderfully accessible to everyone, no matter their technical background. “Craft with Felicia” is the resource I genuinely wish I had when I was starting out.
This guide is my way of helping you skip the feelings of overwhelm so you can make the best decision for yourself and your creative dreams. Whether you’re here to make things for fun or you’re dreaming of turning that passion into profit, I’m so happy to have you along for the ride. Let’s get started!
2. What is a Diode Laser?
So, what is this incredible machine we keep talking about? Let’s pull back the curtain and explain it all, without any of the overly complicated jargon.
Think back to being a kid on a sunny day with a magnifying glass. You’d angle it just right to focus a beam of sunlight into a tiny, powerful dot on a leaf, watching as it got hot enough to start smoking and burn a little hole. A diode laser operates on that very same, simple principle, but it’s been engineered to be infinitely more powerful, precise, and controllable.
- The “Diode” Part: Instead of relying on the sun, the machine uses a high-tech semiconductor device called a laser diode. You can think of it as a tiny but mighty LED light that is designed to generate a highly concentrated and very thin beam of light.
- The “Laser” Part: That beam of light is then channeled through a focusing lens, which narrows it down into an incredibly fine point. This single point of light is so intensely hot and focused that it can instantly vaporize, burn, or melt the surface of many different materials.
Now, while words like “vaporize” might sound a bit dangerous (and any tool requires respect and safety), these machines are a far cry from the giant, complex industrial lasers you see in movies. Diode lasers are specifically designed to be compact, affordable, and safe for hobbyists, crafters, and small businesses. They truly are the perfect gateway into the amazing world of laser creation because they offer a fantastic balance of power and user-friendliness.
Diode vs. CO2: A Quick Intro
You might have also heard people talking about more expensive CO2 lasers and wondered what sets them apart. It’s an excellent question! The easiest way to think about it is that “Laser Engraver” is the general name for the machine, while “Diode” or “CO2” describes the specific engine, or technology, used to create the laser beam.
The comparison between Diode and CO2 lasers is the most common one you’ll encounter, as they differ greatly in how they work, the materials they can handle, and who they are best suited for.
The key to it all is the wavelength of light each one produces.
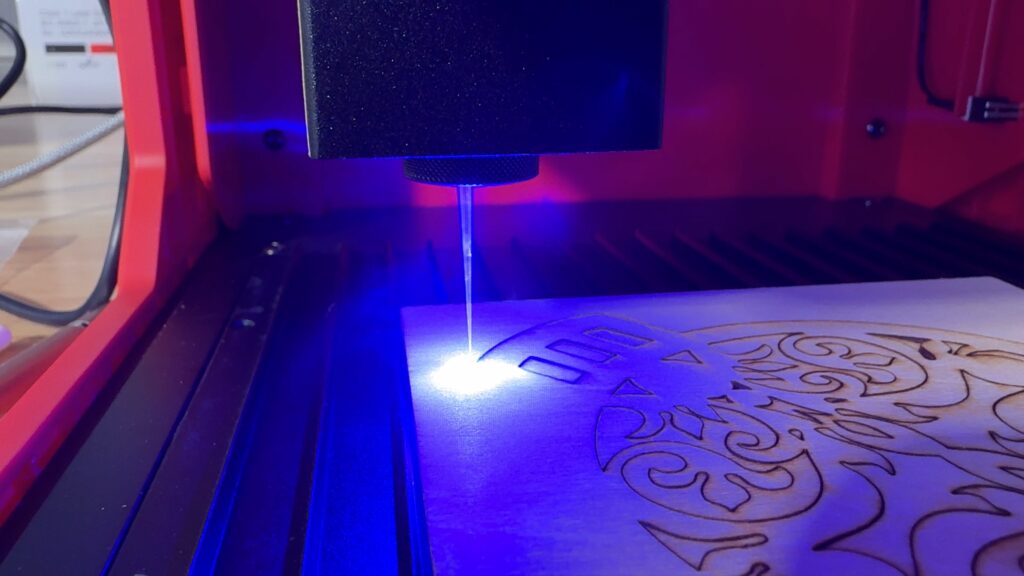
- A Diode Laser creates a visible blue light, with a wavelength of about 455 nanometers (nm).
- A CO2 Laser creates an invisible, far-infrared light with a much longer wavelength of 10,600nm.
This difference in wavelength is everything, because some materials will absorb one type of light while reflecting another. This is why their capabilities can be so different.
Key Differences Explained: A Head-to-Head Comparison
Let’s dive a little deeper into what truly sets these two powerful technologies apart.
Material Versatility
This is, without a doubt, the most important factor that will guide your decision. Think of a CO2 laser as the undisputed champion of versatility. Because its invisible infrared beam is so readily absorbed by organic materials, it can skillfully cut and engrave a massive menu of items that aren’t metal. Its superpower is its effortless ability to engrave on tricky surfaces like clear glass and to cut every color of acrylic, including transparent sheets.
A Diode laser, on the other hand, gets a bit shy around certain colors and materials. Its visible blue light has a tendency to pass right through clear materials or reflect off of white and light-blue surfaces, making it unable to work with them.
A Simple Rule of Thumb: If your creative vision involves working with clear acrylic transparent acrylic, high volume of glass, or the widest possible range of materials, then a CO2 laser is your must-have tool.
Power, Speed, and Getting Things Done
A typical hobbyist diode laser packs about 10-20 watts of optical power, which is fantastic for a wide array of projects. A common entry-level CO2 laser, however, starts at a hefty 40 watts and only goes up from there. This major difference in power means a CO2 laser can perform some serious feats.
A 40W CO2 laser can slice through much thicker pieces of wood and acrylic than even a powerful 20W diode laser can handle.
To achieve the same depth of an engraving, a CO2 laser can move across the material much faster. This makes it incredibly efficient, which is a game-changer if you’re running a business where time equals money.
The Price of Power: Cost of Ownership
Diode Lasers are your budget-friendly entry into the laser world, with a much lower upfront cost. The main part that wears out, the diode module itself, has an incredibly long lifespan and is relatively inexpensive to replace when the time comes.
CO2 Lasers are a significant investment, with a much higher initial price tag. The glass laser tube is a consumable item that needs to be replaced after a few thousand hours of use, and a new tube can cost anywhere from several hundred to over a thousand dollars. You’ll also need to manage a water cooling system to keep the tube from overheating.
So, Which Laser Team Are You On?
Let’s figure out the perfect fit for you!
You should choose a Diode Laser if…
- You are a curious beginner or a passionate hobbyist ready to dive in.
- You’re working with a friendly budget and want the most bang for your buck.
- Your creative dreams are filled with projects made from wood, slate, leather, or dark opaque acrylics.
- You appreciate a machine that is lower maintenance and won’t take up your entire workshop.
You should choose a CO2 Laser if…
- You’re a small business owner or have a side hustle with high-production goals.
- Your projects absolutely require the ability to engrave on clear glass or cut transparent acrylic.
- Speed and efficiency are at the top of your list to keep up with orders and projects.
- You have a larger budget for the initial investment and a dedicated workspace for a bigger, more powerful machine.
This difference in wavelength is crucial because different materials absorb and reflect different wavelengths of light. This is why their capabilities vary so much.
Comparison Table: Diode vs. CO2 Laser Engravers
| Feature | Diode Laser Engraver | CO2 Laser Engraver |
| How it Works | A solid-state semiconductor diode emits light. | A tube filled with CO2 gas is excited by electricity to emit light. |
| Material Compatibility | Excellent for: Wood, leather, dark opaque acrylic, cardboard, slate, anodized aluminum.Poor/Cannot process: Clear or transparent materials, most un-coated metals. | Excellent for: Wood, all colors of acrylic (including clear and transparent), glass, leather, paper, stone, rubber.Can process: Can mark some metals with the aid of a marking spray. |
| Power & Speed | Typically lower power (5W to 40W optical). Slower for deep engraving and cutting. | Typically higher power (30W to 150W+). Much faster engraving and cutting speeds. |
| Cost | $$ – Much lower entry cost. Great for beginners and hobbyists. | $$$$ – Significantly higher initial investment. More suited for businesses. |
| Size & Form Factor | Often compact and available in open-frame designs or smaller enclosed units. | Almost always large, fully-enclosed machines due to power and safety requirements. |
| Lifespan & Maintenance | Longer Lifespan: Diodes last 20,000+ hours.Low Maintenance: No water cooling needed. Modules are often user-replaceable. | Shorter Lifespan: Tubes last 2,000-8,000 hours and are costly.Higher Maintenance: Requires a water cooling system and periodic mirror alignment. |
| Safety Goggles | May require specific colored goggles (usually green or orange) to block the 455nm blue light. Most XTool and WeCreat laser machines come with a laser-safe enclosure. | The entire machine is enclosed, and the polycarbonate lid (often orange or green) acts as the safety shield. |
When you’re deciding between a Diode and a CO2 laser, it can feel like choosing between two different paths on your creative journey. While both can produce incredible results, their core differences in material versatility, performance, and cost will guide you to the perfect machine for your specific goals.
Perhaps the single most important factor that sets these two technologies apart is the materials they can work with. The CO2 laser is the undisputed king of versatility. Its infrared beam is readily absorbed by a vast range of organic materials, allowing it to cut and engrave almost anything that isn’t metal. The CO2 laser’s biggest advantage, and a crucial one for many creators, is its ability to effortlessly engrave clear glass and cut all colors of acrylic, including completely transparent sheets.
On the other hand, a Diode laser’s blue light simply passes through clear materials and is reflected by white or light-blue surfaces, making it incapable of processing them. However, the Diode laser does have a niche advantage: it can often mark certain uncoated stainless steel surfaces without any special additives, a trick CO2 lasers can’t perform.
As mentioned previously, if your business or hobby relies on working with clear acrylic, glass, or the widest possible range of materials, a CO2 laser is the tool you need.
Beyond materials, the difference in performance is speed. A typical hobbyist diode laser might offer 10 to 40 watts of optical power, which is great for many applications. However, a common entry-level CO2 laser starts at 40 watts and goes up from there. This raw power difference means a CO2 laser can slice through much thicker wood and acrylic than even a powerful 20W diode. This also translates to a dramatic increase in speed. To achieve the same engraving depth, a CO2 laser moves much faster, making it far more efficient for anyone focused on production or running a business where time is money.
From a financial perspective, the two lasers occupy very different spaces. A Diode laser represents a much lower upfront cost, making it the accessible, budget-friendly entry point for most beginners and hobbyists. Its main consumable part, the diode module itself, also boasts a very long lifespan and is relatively inexpensive to replace down the road. The CO2 laser requires a significantly higher initial investment.
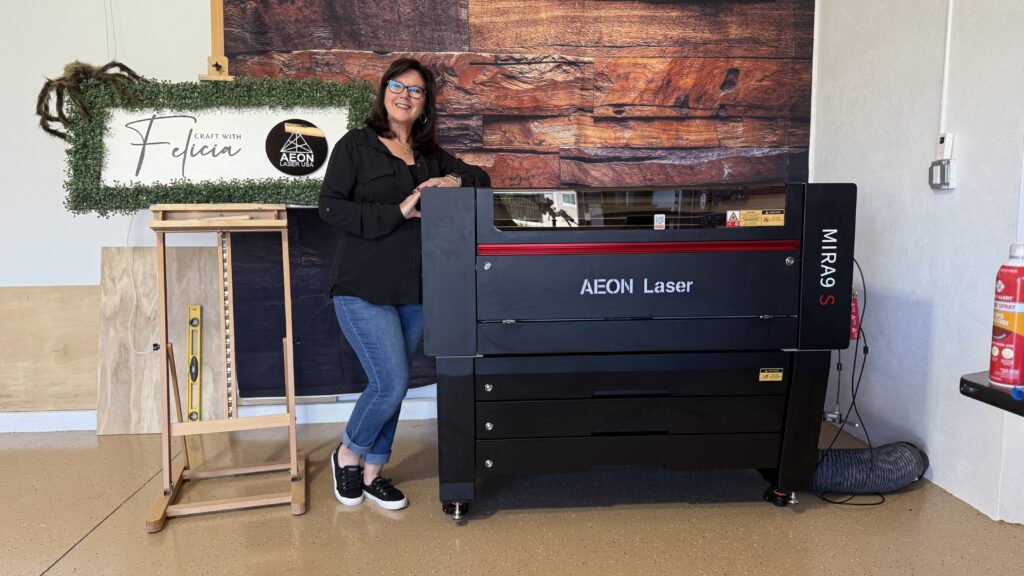
Talking about space, CO2 lasers can be so large they’ll fill a small room! There are desktop models that are a little less powerful, but they’re still considerably larger and heavier than their Diode counterpart.
Further, CO2 glass laser tubes are a consumable item that will need to be replaced after a few thousand hours of use, which can cost several hundred to over a thousand dollars. But if you’re putting that many hours of use on your laser tube, you’re probably earning enough money to cover replacement tubes.
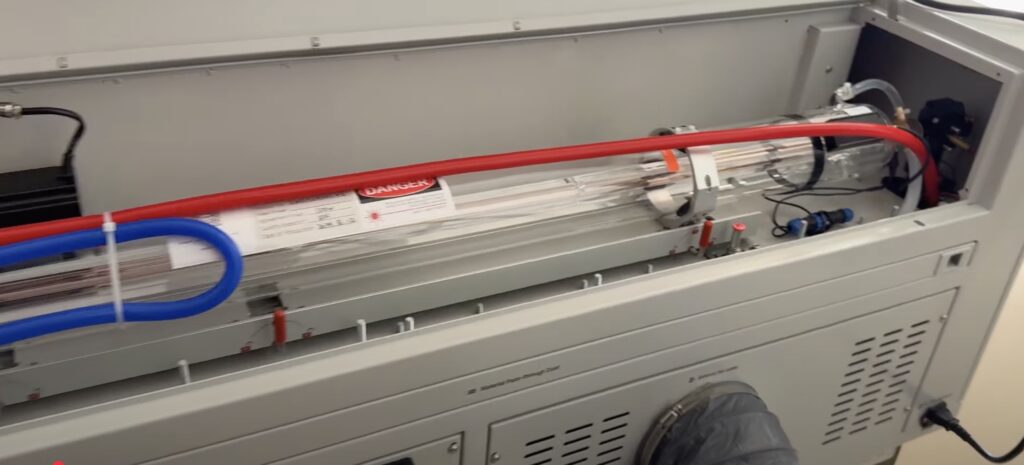
You also have to factor in the ongoing maintenance of a CO2’s water cooling system.
Ultimately, the right choice comes down to who you are as a creator. You should choose a Diode Laser if you are a beginner or hobbyist working within a specific budget. It’s the perfect machine if you primarily plan to work with materials like wood, slate, leather, or dark opaque acrylic and you value a machine with lower maintenance and a smaller physical footprint.
Conversely, you should choose a CO2 Laser if you are a small business owner or have high-production needs. It is the necessary tool if you absolutely must engrave on clear glass or cut clear acrylic. The CO2 is the right investment when speed and efficiency are critical to your workflow, and you have a larger budget and a dedicated workspace to accommodate a bigger, more powerful machine.
3. How Does It All Work? From Screen to Creation
Understanding the process from start to finish is the key to feeling confident. It’s a simple three-step journey:
D-S-C: Design, Send, Create.
Step 1: The Design (On Your Computer)
Everything starts with a digital design. You create or download an image or file on your computer. This could be anything from simple text, to a complex floral pattern, or a shape you want to cut out. Common file types include SVG, DXF, JPG, and PNG. You can use design software like Canva, Inkscape (free), or Adobe Illustrator to make your own files.
Of course! Moving from simply operating a laser to intentionally designing projects for it is where the real magic happens. A little forethought in the design phase can save you enormous amounts of time, material, and frustration, and it’s truly the key to creating stunning, professional-quality results.
Here are the most important considerations to keep in mind when designing your next laser engraving or cutting project.
Your Material Dictates Everything
Before you even draw your first line in a design program, your first thoughts should be about the material you plan to use. The material’s properties will influence every other decision you make.
Before you begin a project, it’s essential to understand the unique personality of your chosen material. Whether you’re using birch plywood, solid walnut, cast acrylic, or rich leather, each surface has its own quirks. For instance, the natural grain and knots in wood can create beautiful variations or cause inconsistencies in an engraving, while the hidden glue layers in plywood can present a tougher challenge for your laser’s cutting beam. Even within a single material type like acrylic, there are differences; cast acrylic engraves with a lovely frosty white finish, whereas extruded acrylic cuts more cleanly but engraves clear. Mastering these characteristics is the first step to predictable, beautiful results.
Beyond its basic composition, you must also consider a material’s thickness, color, and the subtle effect of the laser’s cut width, known as the kerf.
Thickness is especially critical for cutting, as a 10W diode laser that effortlessly slices through 3mm basswood may struggle to penetrate 8mm walnut. You must be realistic about your machine’s power.
Similarly, color is paramount for diode lasers, which typically emit blue light. This light is often reflected or passed through by blue, white, or transparent materials, making them difficult or impossible to engrave or cut.
Finally, remember that the laser vaporizes material, creating a tiny gap, or kerf. While it may only be a fraction of a millimeter, this gap is crucial for projects with precise joinery, like inlays or press-fit boxes, and you must adjust your designs slightly to ensure a perfect, snug fit.
Perhaps the most critical piece of material knowledge involves safety. Under no circumstances should you ever attempt to cut materials containing vinyl or chlorine, such as PVC (the C stands for CHLORIDE). When heated by the laser, these materials release highly toxic and corrosive chlorine gas. This gas can cause permanent, irreparable damage to your machine’s sensitive electronics and metal components and, more importantly, poses a severe risk to your health, particularly your lungs. Always verify your material’s composition before you begin.
The Anatomy of Your Digital Design
How you create your digital artwork is the blueprint for the laser. Understanding these fundamental concepts will solve 90% of common design-related issues.
Vector vs. Raster Images (The Two Languages of Laser): This is the most important concept to grasp.
Vectors are lines, curves, and shapes that are coded as mathematical pathways. Think tracing a circle or any other shape on a piece of paper. Your pen doesn’t lift up off the tracing paper – it’s usually one continuous motion. The laser follows vector paths perfectly. Vectors are used for Cutting and Scoring wood, acrylic, leather, paper, cardstock, and other laser-safe materials. File types like SVG, DXF, and AI are vector-based.
Rasters are pixel-based images, similar to a digital photograph, like a JPG or PNG image you’d see on your computer screen. There are colors and shading in most raster images. The laser head doesn’t follow a path when recreating these images; instead, it moves back and forth, line by line, like a monochrome black-and-white laser or inkjet printer, firing the laser at different intensities for each pixel. Rasters are used for Engraving on materials.
Line Thickness for Cutting: This is a classic beginner mistake. For a line to be recognized as a Cut or Score path, it must have a hairline thickness (often called a “stroke” of 0.01mm or 0.001 inches in design software). If you draw a line in your software and give it a visible thickness (like 2mm), the laser software will see it as a filled shape and try to engrave the outline of your line, not cut it.
Designing for Durability: An incredibly intricate, lace-like design might look gorgeous on your screen, but the finished product could be impossibly fragile. Thin lines of wood or acrylic can easily snap. When designing, ensure that the “bridges” and connection points between cutouts are thick enough to provide structural support.
The same goes for cutting or even engraving tiny, delicate text, which can become illegible or burn away.
Clean Your Vector Paths: Stray points, overlapping lines, or unclosed shapes in a vector design can confuse the laser software. This can cause the laser to stop unexpectedly, cut in the wrong places, or cut over the same line twice, which increases burn marks and fire risk. Just like you would with a Cricut type of cutting machine, you can use functions like “Weld,” “Unite,” or “Join” in your design software to ensure all your cut paths are clean, single, continuous lines.
Post-Processing and Finishing in Mind
A great designer thinks about the final product, not just the laser process. Consider what needs to happen after the laser is done.
Masking for a Cleaner Finish: Engraving or cutting, especially on wood, can leave behind smoke residue and a brownish “halo” around the edges of your design. The single best way to prevent this is to apply masking tape (paper-based transfer tape works wonderfully) over your material’s surface before you start the job. The laser cuts right through the tape, and when you’re done, you simply peel it off, revealing a perfectly clean, crisp design underneath.
Sanding and Cleaning: If you don’t use masking, you will likely need to sand the finished piece to remove smoke stains. When designing, consider if your project has tiny, intricate details that would be impossible to sand effectively. After the job, a quick wipe with a microfiber cloth and a bit of isopropyl alcohol can often clean up light residue.
By keeping these considerations at the forefront of your design process, you’ll move from simply telling the laser what to do, to creating a true partnership with your machine. You’ll produce cleaner, more professional, and more successful projects, saving yourself material and headaches along the way.
Step 2: Sending Your Idea to the Software (The Translator)
Next, you open your design in laser control software. The most popular for beginners are the software that comes with your laser engraver. For experienced users or users who use more powerful lasers, like CO2 lasers, there’s Lightburn – industry-standard third-party laser software.
When choosing a diode laser engraver, the software that drives it is just as important as the hardware itself. Both xTool and WeCreat have developed their own proprietary software designed to be user-friendly, but they have distinct differences in their approach, features, and user experience.
Here’s a detailed look at xTool Creative Space (XCS) and WeCreat MakeIt!, and how they compare.
xTool Creative Space (XCS)
xTool Creative Space is the free, all-in-one software designed to operate xTool’s entire lineup of machines, from the enclosed P2 (CO2) and S1 (diode) to the hybrid M1 and the portable F1.1 It’s built to be an accessible ecosystem for beginners while adding features for more advanced users.
Key Features:
- Unified Ecosystem: A major strength is that one software controls all xTool machines. This creates a consistent user experience if you own or upgrade to different models.
- Extensive Material Library: XCS boasts a vast, cloud-based library with pre-tested settings for hundreds of materials. You can select your machine and material (e.g., “3mm Basswood – Cut”), and it loads the recommended power and speed settings, which is a massive help for beginners.
- AI-Powered Features: xTool has heavily integrated AI for features like design generation and intelligent path planning, which optimizes the engraving/cutting route for up to 3x faster job completion on certain projects.
- Basic Design & Editing Tools: The software includes tools to create shapes, insert text, edit vector paths (node editing), and work with layers. It can import common file types like SVG, DXF, JPG, PNG, and BMP.
Machine-Specific Features: XCS is built to leverage the unique hardware of xTool machines, such as the twin-point positioning of the S1, the 3D curve engraving on the P2 and S1, and the blade-cutting functionality of the M1. - Multi-Platform Support: XCS is available on PC, Mac, iPad, and mobile devices, allowing for a flexible workflow.
XCS is ideal for beginners and hobbyists who want a straightforward, guided experience. The material library and machine-specific integrations remove much of the initial guesswork and learning curve associated with laser engraving. It’s perfect for users who are invested in the xTool ecosystem.
WeCreat MakeIt!
WeCreat’s software, MakeIt!, is the companion to their WeCreat Vision and Vista series of enclosed diode lasers. The software’s design philosophy centers on making the process from idea to finished product as seamless and simple as possible, with a strong emphasis on visual alignment and ease of use.
Key Features:
- Camera-Centric Workflow: The software is built around the built-in HD camera. You get a live, top-down view of your material on the screen. You can simply drag and drop your design exactly where you want it to be engraved, making alignment incredibly intuitive.
- AI Image Generation: Similar to XCS, MakeIt! includes a built-in AI art generator. You can type a text prompt, and the software will create laser-ready images for you.
- Auto-Lifting and Auto-Focus: MakeIt! software controls the machine’s signature auto-lifting gantry. When you place material inside, the software triggers the machine to automatically adjust the laser’s height for perfect focus, which is a standout feature for ease of use.
- Beginner-Friendly Interface: The layout is clean and uncluttered. Assigning cut, score, or engrave settings to different parts of a design is straightforward.
- LightBurn Compatibility: Recognizing that advanced users may want more powerful tools, WeCreat machines and their cameras are fully compatible with LightBurn, the industry-standard third-party laser software. This provides an excellent upgrade path for users who outgrow MakeIt!’s capabilities.
WeCreat MakeIt! is also well-suited for beginners who value visual placement and a “what you see is what you get” experience. The camera integration and auto-focus make the setup for each job incredibly fast and simple.
Key Differences at a Glance
| Feature | xTool Creative Space (XCS) | WeCreat MakeIt! |
| Primary Philosophy | An integrated ecosystem with a vast material database and smart pathing. | A visually-driven workflow centered around a live camera view and automation. |
| Design Placement | Relies on crosshair positioning or camera snapshots (on models with cameras). S1 uses a unique twin-point system. | Live, top-down camera view for easy drag-and-drop placement. |
| Material Settings | Extensive, cloud-based library with settings for hundreds of materials. | Good built-in library, with a focus on ease of use. |
| Key Automation | AI-driven path planning for speed optimization. | Auto-lifting gantry for hands-free auto-focus. |
| Unique Features | 3D curve engraving, blade cutting (on M1), manages multiple machines at once. | Seamless camera-based alignment, batch processing via camera view. |
| Advanced Editing | Includes basic vector node editing and more robust design tools. | More basic editing, encouraging use of external design software or LightBurn. |
| 3rd Party Software | Works with LightBurn, but some unique features (curve engraving, etc.) may only work in XCS. | Fully compatible with LightBurn, including the camera functionality. |
| Platform | PC, Mac, iPad, Android, iOS | PC, macOS, iPadOS, Android, iOS |
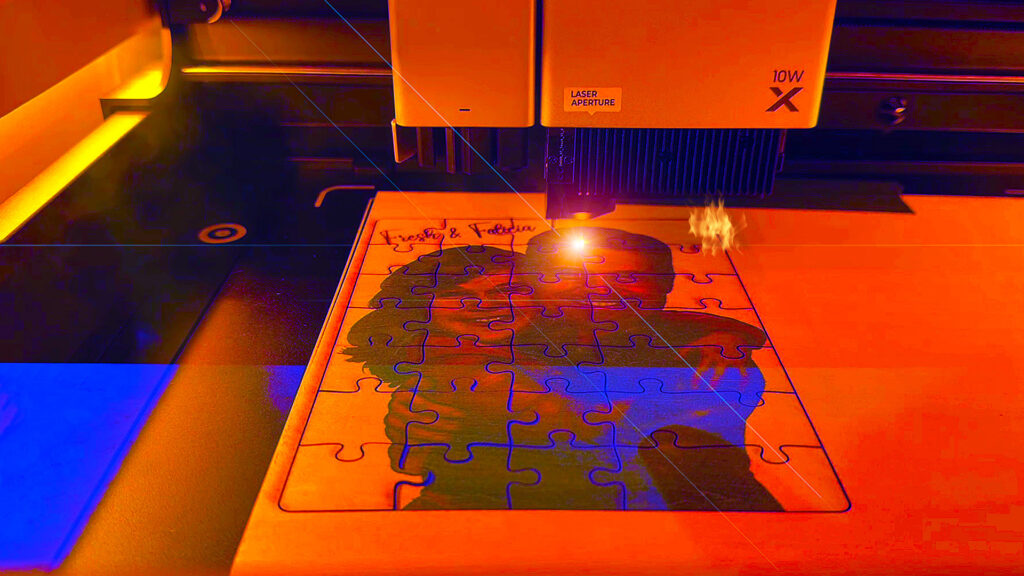
Step 3: Create!
Now it’s time to hit that SEND button and watch your magic come to life! But be patient. Some cuts are complicated and may take a little time.
Once you have your settings dialed in, you press “Start,” and the software translates your design into a set of instructions the laser can understand.
The laser machine receives the instructions and gets to work! A motorized gantry system moves the laser module left, right, forward, and back over your material, firing the laser beam precisely according to your design.
- Engraving: The laser moves quickly or uses lower power to just mark the surface.
- Cutting: The laser moves slower or uses higher power to burn all the way through the material.
And that’s it! You’ve successfully turned a digital idea into a physical object.
You may need to “finish” your product. Basically, that means sanding, painting, or assembling the parts. But, depending on your design, clever designers call things “rustic,”“farmhouse,” “thrift.” and “naturally aged” to avoid finishing products, saving them time and money.
Step 4: Conclusion
- Choose xTool and XCS if… you want a system that holds your hand with an enormous material library, you value AI-powered speed optimization, and you plan to stay within the xTool ecosystem with its unique features like curved surface engraving.
- Choose WeCreat and MakeIt! if… your top priority is ease of use through a simple, visual, drag-and-drop interface. The live camera and auto-focus system create a near-flawless setup experience, and the guaranteed compatibility with LightBurn offers a clear path for future growth.
The software acts as the bridge between your design and your machine. In the software, you’ll tell the laser:
- What to do: Engrave this part, cut that line.
- How fast to go: The “Speed” setting.
- How strong to be: The “Power” setting.
4. Choosing the Right Machine
Stepping into the world of laser engravers can feel a bit like navigating a vast, dazzling sea of options, and it’s completely normal to feel a little overwhelmed at first. But don’t you worry! The great news is that as a beginner, you don’t need to get bogged down in every last technical detail. By focusing your attention on just a few key features, you can confidently choose a fantastic machine that will be the perfect partner for your creative journey.
Let’s start with the most important specification of all: the laser’s power. Think of this as the engine of your machine.
Measured in optical watts (W), this number determines how fast your machine can work and what materials it can effectively cut. For someone just starting out, a 10W machine is a fantastic choice, offering plenty of power to engrave beautifully and cut through thinner sheets of wood and acrylic.
If you have a bit more room in your budget, a 20W machine is even better, giving you a noticeable boost in speed and cutting capability.
Now, here’s a crucial beginner tip that will save you a lot of confusion: manufacturers often advertise “input power” or “machine power,” but the number that truly reflects the machine’s performance is its optical power. Always look for that spec.
Next up is the work area. This simply refers to the physical size of the engraving bed, often listed in millimeters, like 400×400 mm, approximately 15.75 inches square.
The question to ask yourself is, “How big are the projects I dream of making?” For most hobbyists creating signs, gifts, and personalized items, a standard 400×400 mm area provides a generous canvas to get started and bring countless ideas to life.
The working area of the WeCreat Vision is 16.5 inches by 11.4 inches (approximately 508mm x 305mm). There is a conveyor belt extension which increases the potential length of projects up to about 138 inches long.
The working area of the xTool M1 is 15.15 inches by 11.8 inches (385mm × 300mm).
Remember when working with materials and designing objects that the smallest workspace area will guide how large of a project you can work with when dealing with proportions. Basically, that means you can’t make a circle with a diameter of more than 11.8 inches on the xTool M1 or 11.4 inches on the WeCreat Vision.
You can, however, create designs that interlock to create larger designs. This takes a little more thought and ingenuity, but with proper planning, it can be done easily.
Beyond power and size, nothing is more critical than the safety features built into the machine. These are truly non-negotiable. A quality machine will come equipped with a suite of protective functions designed to keep you safe. You should look for a colored protective shield around the laser module itself to help guard your eyes.
Another vital feature is an integrated flame detector, which can sound an alarm or even automatically shut off the machine at the first sign of trouble. Modern machines often include a gyroscope or tip-over sensor, which acts as a brilliant fail-safe, instantly cutting the power if the engraver is ever accidentally bumped or tilted. And of course, a large, easy-to-press emergency stop button is an absolute must-have for complete peace of mind.
Now, let’s talk about a feature that might just be the single best enhancement to your laser crafting experience: air assist. This is a small nozzle that blows a steady stream of air directly onto the spot where the laser is working. It sounds simple, but it is an absolute game-changer. This constant airflow produces dramatically cleaner cuts, significantly reduces the smoky charring on the edges of your material, and lowers the risk of flare-ups, making the whole process safer. I highly recommend choosing a machine that either includes an air assist pump or can be easily upgraded with one down the line.
Finally, consider the practical matter of getting your new machine from the box to your workbench. Most beginner machines will require some assembly, but many brands now offer fantastic models that arrive 90-95% pre-assembled and can be put together in under thirty minutes. If you’re not a fan of complicated instructions and just want to get to the fun part, looking for one of these “quick assembly” options is a great idea.
By focusing on these core features, you can confidently choose a machine that fits your creative goals and your budget without getting lost in technical details.
5. Getting Started With Confidence
You’ve chosen your machine, and it has arrived. Awesome! Here’s how to go from unboxing to your first successful project without the stress.
Safety First: Your Non-Negotiable Rules
Your creativity is important, but your safety is paramount. Always follow these rules:
- WEAR YOUR GOGGLES: The laser beam can cause permanent eye damage instantly. Your machine will come with special safety goggles. If your laser does not come with a laser-safe enclosure with the proper orange or green protective glass, wear laser safety goggles every single time the laser is powered on. No exceptions.
- VENTILATE YOUR SPACE: Lasers burn material, which creates smoke and fumes. Some of these fumes can be toxic. Work in a well-ventilated area, like a garage with the door open, or invest in an enclosure with an exhaust fan that vents outside. If outdoor ventilation isn’t possible, there are several indoor fume extractors that will filter the smoke from the air. One of our favorites is the WeCreat Ultra fume extractor.
- NEVER LEAVE IT UNATTENDED: A laser is a heat source, and there is always a risk of fire. Never, ever walk away from your machine while a job is running. Also, clean up your scraps after cutting. Thin wood is used as tinder to create fires! Keep a small fire extinguisher nearby for peace of mind.
The moment has arrived. Your new laser engraver is set up, and the creative potential is buzzing in the air. The best way to channel that excitement is to aim for a quick and satisfying win with your very first project. While it can be tempting to jump straight into a complex masterpiece, the key to building lasting confidence is to start simple. Think of this first run as your machine’s “Hello World” moment—its very first words, a simple test to ensure everything is working beautifully before you move on to bigger conversations.
Your journey begins by choosing the right practice canvas. Before you even think about using that expensive piece of finished wood or leather, grab some scrap material. A simple piece of cardboard or a leftover bit of plywood is your best friend here. This is your zero-pressure playground, a space where you can experiment freely without the fear of messing up a valuable item. Once you have your practice piece, the next step is perhaps the most critical for achieving a clean, professional result: focusing the laser. Your machine will have a specific method for focusing its laser beam into a tiny, pinpoint-sharp dot on the material’s surface. An unfocused laser is like a dull pencil; it will create a blurry, weak line. Take a moment to follow the instructions in your machine’s manual—it’s usually a very simple process that makes all the difference in the quality of your work.
With your laser perfectly focused, it’s time to unlock the secrets of your material by running a test grid.
Most laser software, like LightBurn or the programs from xTool and WeCreat, have a built-in tool to create a “Material Test” grid. This feature will engrave a series of squares onto your scrap wood, each with a slightly different power and speed setting. Every piece of wood is unique, and this grid allows you to see with your own eyes exactly how the laser interacts with it at various settings. It’s a game-changing step that completely removes the guesswork from all of your future projects, providing you with a reliable “cheat sheet” you can refer back to time and time again.
Now that you’ve done your prep work and understand how your laser speaks to the material, you’re ready for the main event. It’s time to engrave your first simple shape! Choose something basic and fun—draw a star, a circle, or even just type your name in the software. Position the design over your scrap material, put on your safety glasses, take a deep breath, and press that “Start” button.
Then, just watch the magic happen. There is nothing quite like the incredible feeling of seeing your digital design brought to life for the very first time. You’ll see the focused point of light trace the path you created, leaving a crisp, clean line in its wake as the faint, pleasant smell of engraved wood fills the air. That simple star or name appearing on the material isn’t just a test; it’s a trophy. It’s your first success, a tangible proof of concept, and the confident first step on what is sure to be an amazing creative journey.
By starting with a safe setup and a simple test project, you’ll build the foundational skills and confidence you need to tackle any creative idea you can dream of.
6. Your Next Steps on the Laser Path
Congratulations! You now have a solid understanding of what diode lasers are, how they work, and how to get started safely and confidently.
This guide is just the beginning of your journey. The world of laser crafting is vast and exciting, and the most important thing you can do now is to keep creating and keep learning.
Your journey doesn’t have to be a solo one. If you’re looking for more tips, inspiration, and a friendly place to ask questions, I’d love for you to connect with our community.
Join Our Community:
Come join my free “Laser Crafters Collective” Facebook Group! It’s a place for beginners and experts alike to share projects, troubleshoot problems, and celebrate creative wins together.
Follow for More:
For weekly video tutorials, project ideas, and machine reviews, be sure to subscribe to my YouTube channel.
You have the knowledge to get started. Now it’s time to fire up that laser and unleash your creativity on the world. I can’t wait to see what you make!
Happy Crafting!
Felicia Fresh