Welcome to the official Crafting Fun with Family Unit’s Beginner’s guide to xTool M1 – how to use xTool Creative Space! Creative Space is the free, robust, fully functional, and easy to use program that xTool includes to make really cool things with your M1 laser cutter and engraver. We were amazed to learn that in addition to our 10W laser, xTool M1 also has a blade to cut cardstock and all kinds of vinyl! It’s the perfect machine for people who want the freedom to cut almost anything under 6mm thick.
For years we have wanted to experiment with a laser cutter, but the high prices always deterred us. The xTool M1 swiftly rose to prominence on Kickstarter, achieving full funding in a mere 15 minutes and surpassing the $1 million mark in the initial five days. This surge in support was fueled by enthusiasts who were captivated by its unique fusion of laser cutting and blade cutting capabilities, akin to those found in Cricut or Silhouette machines. xTool parent company Makeblock launched the xTool M1 for public sale in late June 2022. Since then, laser cutters have become extremely popular, offering a versatile range of functions. The M1 and its diode laser (more on that later) can slice through or engrave many kinds wood, leather, acrylic, rubber, ceramic, stainless steel (tumblers, tags, keychains), cork, slate, glass, some fabrics, and even food. When xTool reached out and asked if we would like to try their M1 Smart Laser Engraver and Vinyl Cutter, we were like, “Yes, please!”
It was love at first cut.
Materials used in our M1 video and blog post (affiliate links):
xTool M1 (official website): https://www.xtool.com/
Amazon xTool M1 Laser Engraver Bundle – https://amzn.to/49CQ7QH
Our xTool M1 was 99% assembled in the box. All we had to do was insert a blade into the cutting blade housing, attach the magnetic cutting blade housing right next to the laser, and attach the exhaust hose. You will want to vent laser cutting or engraving smoke or fumes outdoors, or it’ll really smell up your craft room. We rigged it up with our old portable air conditioning exhaust hose and vented it out of our window. It was all super easy! Watch our video below to see the entire process along with the contents of the box, and what we were able to create with our xTool M1 on day one.
In our video above, in addition to our M1 setup and first project demonstration, we show what is in the box of the xTool M1 10W Deluxe laser cutter machine:
- M1 machine
- Black 4″ exhaust pipe with a spring clip
- 110V power cord
- 6′ old-school USB-A cable
- 6 “triangular prisms” (3-sided hollow metal triangle-shaped rods used to elevate things you want to laser cut)
- 4 wood risers (to elevate the machine for engraving taller things like tumblers)
- The RA2 Pro rotary kit (for automatically turning tumblers or cylindrical objects while engraving)
- A magnetic brass-colored blade housing with 5 replacement blades (attach this underneath, right next to the laser lens)
- Light grip and heavy grip cutting mats
- xTool basic materials pack, including:
- Sample permanent adhesive vinyl
- Sample faux leather sheets
- Sample sticker paper
- One piece of 3mm thick laminated basswood
- One engravable stainless steel dog tag
Our 10 Watt package came with the Premium Material Package. This is a fun box filled with tons of sample materials to play with as you explore the functionality of your M1 and Creative Space software.
Before delving into the specifics of xTools Creative Space software for beginners, I’d like to highlight that this post includes several short video tutorials. Watching these can often be more helpful than just viewing images and reading explanations. Like many of you, we are also starting out on this journey. Here is a video tutorial of an excellent first project.
xTool Creative Space Software: Free, Easy, and POWERFUL
xTool’s free software, Creative Space, is very easy to use, and especially if you have any experience with vinyl cutting software like Cricut Design Space or Silhouette Studio. We started with a very basic text design to get the feel for our M1 laser cutter. It was very intuitive to change the font, size, and spacing. We loved that we can use any font on our computer, even handwritten or script fonts. Some script fonts overlap causing problems with cutting or engraving. No problem with the xTool M1, because there is a built-in weld function in the software that works perfectly to combine the fonts with no strange cut marks. We were able to score and engrave our test on to the included 3mm basswood easily.
How To Get Started with xTool Creative Space Software
The xTool Creative Space software is designed to be user-friendly, especially for beginners. Here’s a general guide on how to use it:
Installation and Setup:
- First, download and install the xTool Creative Space software from the official website here: https://www.xtool.com/pages/software
- Once installed, open the software and follow the setup instructions. This may include connecting your M1 to your computer using the included USB cable.
Creating a New Project:
- Begin by starting the software. Your canvas will automatically open to a new project.
- You can choose to start with a blank canvas, or select from pre-designed templates available in the software.
Designing and Importing:
- Use the built-in tools to create your design directly in the software. This can include adding shapes or text that shows whatever you type.
- You can also import logos, photographs, or designs created in other graphic design software.
- xTool Creative Space supports common file formats like SVG, PNG, JPG, DXF.
- Once your design is in place, you can edit and customize it using the software’s features. This includes resizing, rotating, adjusting positions, and more.
Material Settings:
- Choose the material you are working with from the software’s material library. Most of the included sample materials have presets built into the software. Check your material guide for the correct settings. This ensures the software adjusts the laser settings accordingly for optimal results.
- If your material is not listed, you may need to manually set the laser parameters. You can set specific parameters for cutting and engraving, like laser power, speed, and the number of passes.
- Be careful with the settings. Too much laser power with certain materials can create a lot of smoke or even a fire! The common power settings for the xTool M1 depend on several factors:
- Material Type: Different materials require different laser power settings. For example, softer materials like wood or cork require lower power settings, while harder materials like stainless steel or ceramics may require higher power.
- Material Thickness: The thickness of the material also influences the power setting. Thicker materials may need multiple passes for effective cutting or engraving.
- Desired Effect: If you are engraving, lower power settings are typically used to avoid cutting through the material. For cutting, higher power is necessary to penetrate through the material completely.
- Speed of the Machine: The speed at which the laser moves over the material interacts with the power setting. A slower speed with a lower power setting can have a similar effect as a higher power setting at a faster speed, resulting in less chance of burning.
- Laser Power Capability: The xTool M1 comes with two different laser head options, each with its own power capacity. The power settings you use will depend on the specific laser head you have.
- Don’t use the laser to cut thin paper or vinyl. That’s what the built-in blade is for!
Preview and Adjust:
- Use the camera preview function to get a real-time view of your cutting or engraving area with your material loaded into the machine.
- Use the frame function to ensure your laser is going to do its business exactly where you want it. You will need to press the blinking power button on the front of the machine to begin framing.
- Make any necessary adjustments to your design or settings before proceeding.
Sending to the Machine
- Once you’re satisfied with the design and settings, send the project to your xTool machine.
- Ensure that your material is properly placed and secured in the machine.
- Don’t forget to use your triangular prism risers if you’re going to do a cut.
Starting the Engraving/Cutting Process:
- Double-check all settings and the positioning of your material.
- Begin the engraving or cutting process by starting the process through the software.
- You will need to press the blinking power button on the front of the machine to begin cutting or engraving.
Monitoring and Safety:
- Follow all safety guidelines, like ensuring good ventilation.
- Vacuum or wipe away any excess wood, paper, dust, or other debris from the inside of your M1 frequently.
- Don’t leave the room or area when your M1 is working. Monitor the process to ensure everything is working correctly.
- The power button immediately stops all laser processes in the event of a fire or other problem.
- Opening the protective lid also stops all cutting or engraving processes.
- Most small wood embers burn out very quickly, but it’s not a bad idea to have a small fire extinguisher handy just in case.
Finishing Up:
- Once the job is complete, wait for the material to cool down before removing your material.
- Inspect your finished product.
- Clean up any debris.
Remember, it’s always crucial to read the specific instructions and safety guidelines provided with your xTool machine and the Creative Space software. Experimenting with small, simple projects at first can help you become more familiar with the software and the capabilities of your machine.
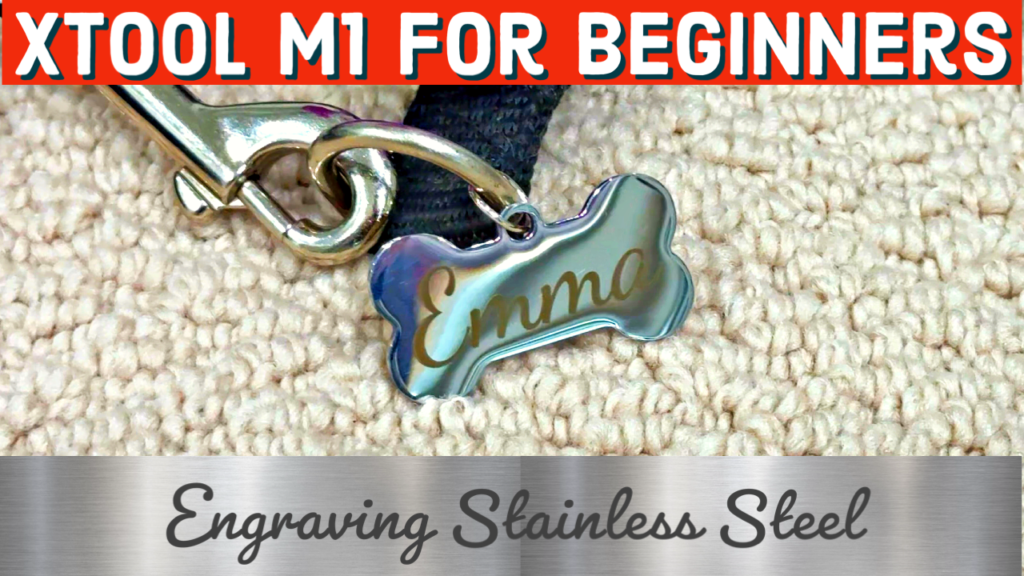
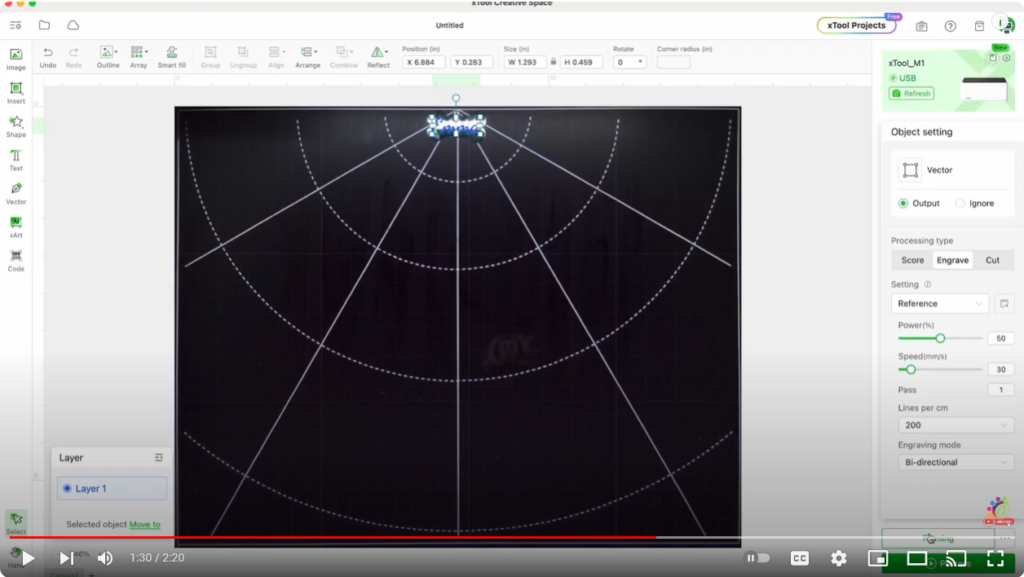
Setting Creative Space to Engrave Stainless Steel
We’ve done projects with basswood using our Cricut Maker. But we have never had the ability to do anything with metal! We were super excited when we put the included metal dog tag into the machine to engrave it. We put it flat on the metal plate. The M1 has a very cool camera feature that shows you in the Creative Space software exactly where the laser will do its business. We lined it up exactly where we wanted it. We made our text super small to fit the dog tag. Creative Space has tons of preset settings for laser power, speed, and passes. We scanned the list of presets and found the stainless steel dog tag. We chose “engrave.” We ran the “framing” process to make sure the text was going to be engraved where we wanted it, and pressed start. In minutes, we had the cutest engraved dog tag! Watch below:
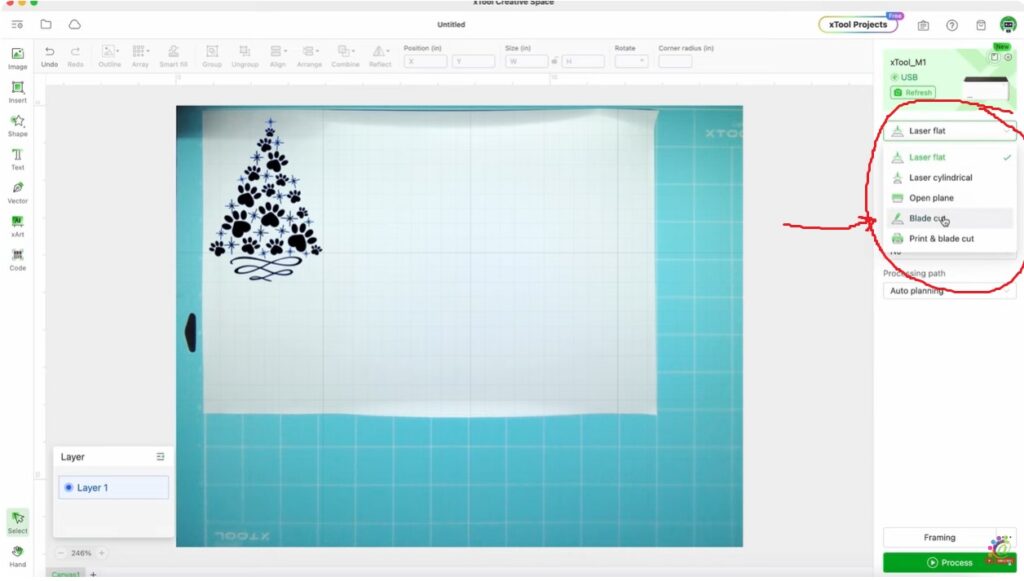
Changing From Laser Cutting to Blade Cutting
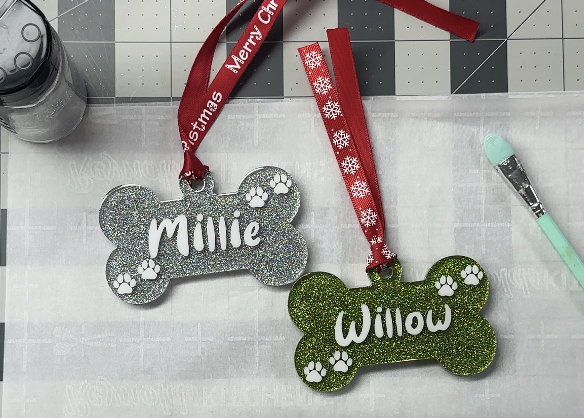
We also tested heat transfer vinyl cutting using the included cutting blade, not the laser, to determine if the kiss-cut function was accurate on really small designs, and it was perfect. In Creative Space software, you can choose the drop-down menu to select “blade cut” when you want to cut stickers, paper, cardstock, or several types of vinyl. This is an amazing function!


I searched Google for an hour and this article was the only one that answered all my Xtool questions. Excellent work. Thank you.