We have received countless questions on how to make stickers or decals with the Cricut Joy Xtra. With the addition of print then cut functionality to Cricut’s newest machine, we are excited to present the ultimate guide to creating stickers and decals using your Cricut Joy Xtra.
Decals Versus Stickers – What’s The Difference?
People often confuse decals and stickers. The truth is there is no official legislating or designating body that has the authority to define the difference. Stickers and decals are similar in many ways, but professional sign shops and printing companies get weird when lay people like us confuse the two. It’s good to know the hearsay difference, just in case. One important thing to note is that although all decals are stickers, not all stickers are decals. Here’s why.
Decals are typically made of long-lasting vinyl or plastic, and can be used indoors or outdoors. They have a semi-permanent adhesive, are usually made with UV-resistant vinyl or coatings and can last for several years. Most decals are limited to a few colors and are cut to shape. Decals come with a peelable layer that exposes their adhesive, or sometimes with a transfer tape to help apply them to glass, metal, or other smooth surfaces.
Here’s where it gets a little confusing. Although stickers can be made with the same materials as decals, they’re typically printed with laser or inkjet printers on to thinner materials like sticker paper or printable vinyl. They can also be cut the Cricut Joy Xtra print then cut functionality. Most vendors will tell you stickers are meant for indoor use but we’ve made waterproof and UV resistant stickers that we have used outside for quite some time.
The main difference between stickers and decals is that stickers allow a much more flexible use of colors and gradients than decals . But, that could change and probably already has by the time you read this.
Making Decals With Your Cricut Joy Xtra
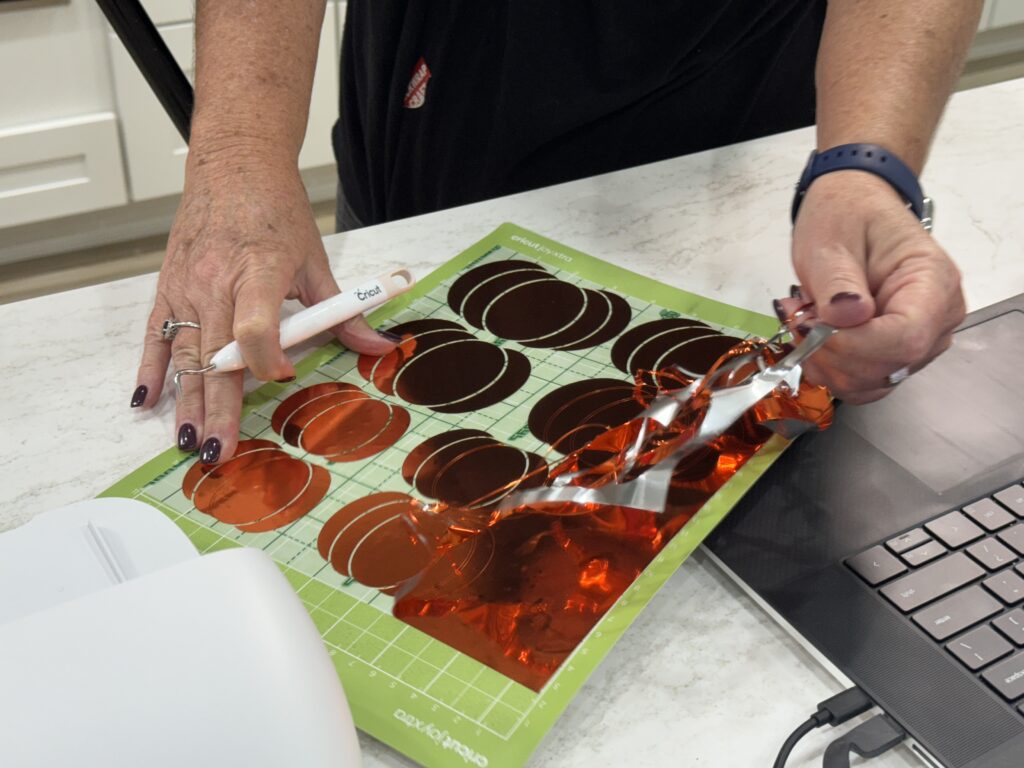
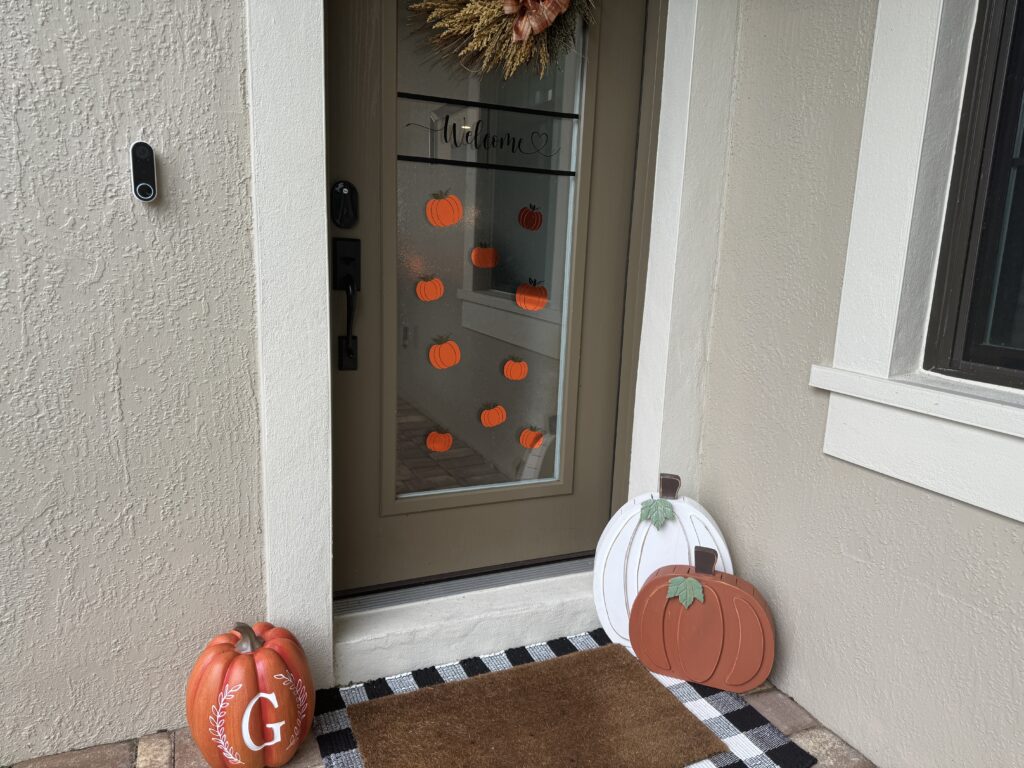
Keeping it simple with fewer colors, we made some pumpkin decals for our glass front door to decorate for the fall season. We used Cricut’s Design Space software to find a cool looking pumpkin we could cut using our Cricut Joy Xtra. We found a very nice design that had the pumpkin, a stem and some leafy foliage that worked well together.
We decided to use decals for this project for two reasons: 1) permanent vinyl offers some unique colors and finishes that aren’t possible with most consumer grade printers. We chose a very cool permanent vinyl from Teckwrap with a mirror chrome finish for a bougie look. Hey, our neighborhood is a little fancy. You can use any brand of permanent or removable vinyl to do a project like this.
And, 2) since our front door is exposed to several hours of direct sun in the afternoon, we felt the ink used for stickers might fade over the several weeks we planned to display our pumpkin designs. A decal created with permanent vinyl seemed like a better choice.
Different Types of Vinyl
It is important to note there are several different types of vinyl you can cut with your Cricut Joy Xtra.
Permanent vinyl can be a little thicker to resist cracking and curling, has a protective UV coating to keep its color true, and has a stronger adhesive that is designed to last for years. It is ideal for projects that will be exposed to the elements, such as car decals, door or window decals, outdoor signs, and drinkware. Permanent vinyl can also be used for indoor projects, such as wall decals or labels for various containers or appliances. Permanent vinyl is removable with a little effort and sometimes leaves a little adhesive behind that might need to be cleaned with a solvent like Goo Gone.
Removable vinyl has a weaker adhesive that is designed to be easily removed without leaving any residue behind. It is ideal for projects that will be temporary like sale decals placed on windows, for temporary event decor like birthday parties or weddings, or maybe instruction or reminder labels for borrowed equipment. Removable vinyl is also commonly used for indoor projects such as wall decals when you don’t want to damage the underlying paint or laminate.
Another type of vinyl is heat transfer vinyl (HTV). Along with a heat press or iron that activates its adhesive properties, HTV is used to adhere vinyl to garments like t-shirts, hoodies, hats, or bags. It can also be used on glass, ceramics, or wood. It’s not easily removable and not recommended for decals.
Our Pumpkin Decal Project
We organized several pumpkins on one mat so they would cut evenly and without overlapping each other. Since each part of the pumpkin design is a single color, we cut all the parts individually for assembly later. We cut each roll of permanent vinyl to the size we needed that would fit on to the Cricut Joy Xtra standard grip mat.
The cuts were simple and came out perfectly. We used transfer tape to apply each part of the pumpkin decals to our glass front door individually. Alternatively, you can layer each pumpkin starting with the base color and then use transfer tape to lift all the layers and apply each completed pumpkin to its destination. Either way, they look fabulous!
Making Stickers with your Cricut Joy Xtra
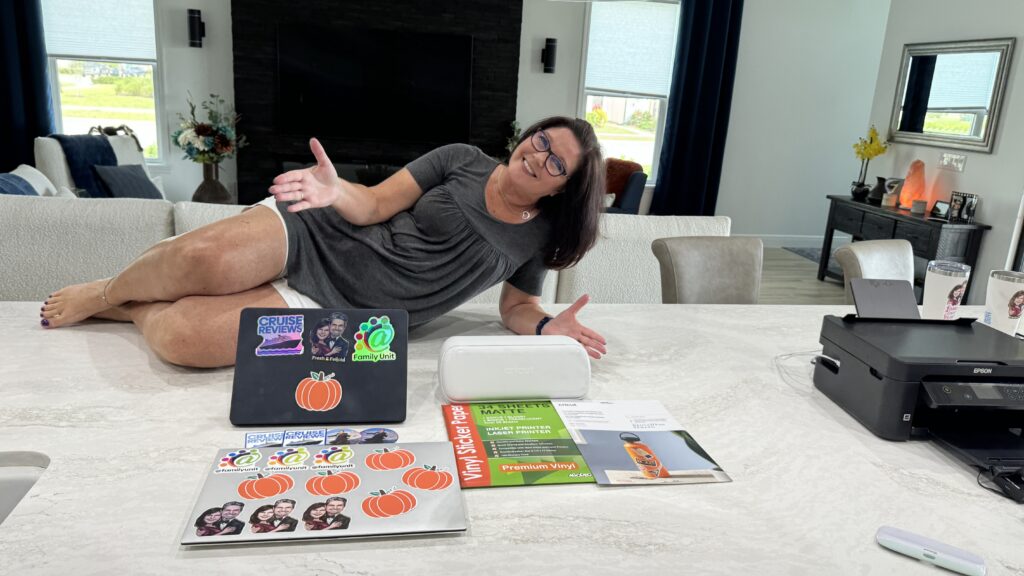
We wanted to create some cool stickers for our YouTube channels to help promote them when we travel. People will usually ask us about our productions on cruises, at trade shows, and at craft fairs, which helps us grow our following.
Since our logos are comprised of photographs or other designs with several colors and gradients, it’s either extremely difficult or impossible to reproduce them accurately with vinyl decals. We decided to make stickers instead.
Inkjet Printer Considerations for Stickers
There are two main ink types used with common consumer inkjet printers made by HP, Canon, Epson, and other manufacturers – dye and pigment inks. They differ in their composition, properties and applications. You can really use any inkjet printer to make stickers, but some types have advantages.
Dye ink is made of colored chemical dyes dissolved in a liquid carrier, usually water. It is less expensive to produce dye ink than pigment ink and usually produces more vibrant colors. However, most dye ink is less water-resistant and fade-resistant than pigment ink. Dye ink is typically used for printing documents and photos that will be viewed indoors and for a temporary period of time.
Pigment ink is made with bazillions of microscopic solid color particles suspended in a liquid carrier. It is more expensive to produce than dye ink but is more water-resistant and fade-resistant once dried. Pigment ink is typically used for printing documents and photos that will be viewed in sunny rooms or outdoors for several years. Pigment ink is typically used for printing on specialty media such as glossy paper or canvas. It’s sometimes referred to as “archival ink.”
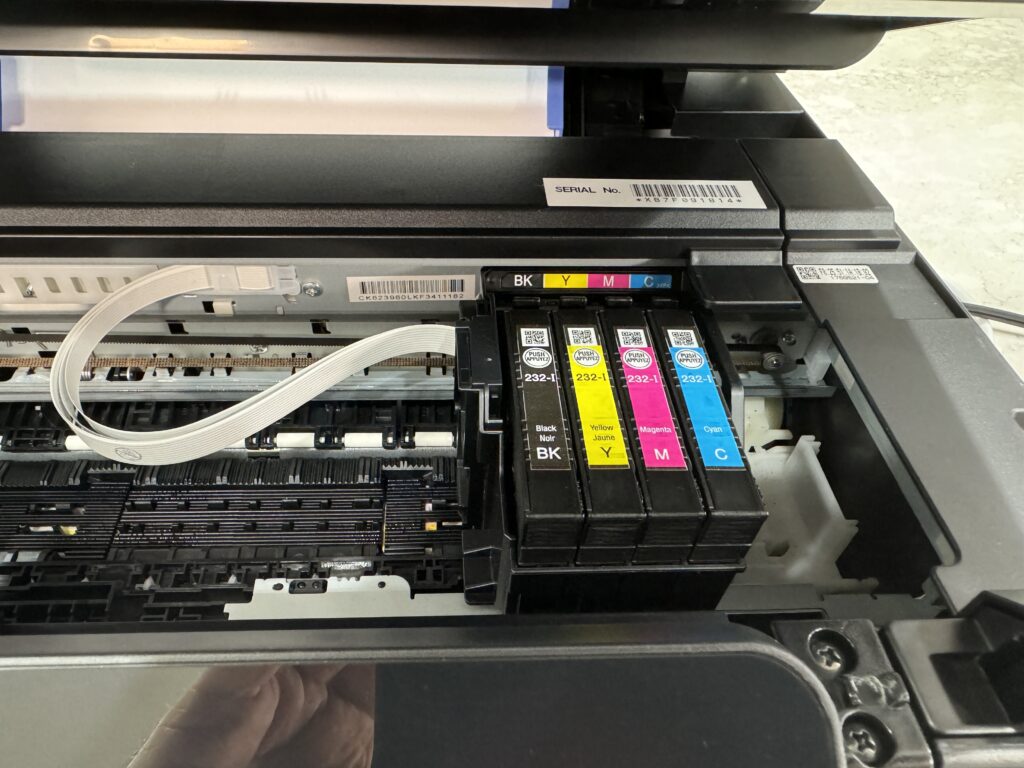
Recently, there are other types of inks and hybrids developed by really smart chemists. For example, our Epson Expression X-4205 uses a special ink called Claria ink featuring three individual color dye ink cartridges and a separate black pigment ink cartridge. Because Epson’s Claria ink is a dye-based ink set where ink is absorbed into the receiver layer of photo papers, the color part of images printed on special sticker papers with this type of layer is more resistant to scratches caused by handling. Its black pigment ink, however, is slightly more scratchable. Claria ink is said to be “smudge, scratch, water, and fade resistant” on Epson’s own brand of special photo paper, and perhaps also on some other specially formulated sticker papers.
Laser printers can also be used to create stickers but be careful. Only use paper that specifically says FOR LASER PRINTERS. Some inkjet papers have a coating that could melt during the laser printer heating process and damage your laser printer. Also, we’ve found some laser prints are susceptible to scratch damage.
Designing Great Stickers
There are a few considerations our professional printer friends shared with us that will help you make the most of your sticker making journeys.
What size sticker do you need? Don’t make your stickers too big – or too small. Figure out how you plan to use your stickers before you print them. Do you plan to put them on your car window, on a notebook or on the back of your smartphone? A sticker on a car window will probably be larger so the poor saps behind you can actually read it, while a sticker on the back of your smartphone has to be small enough to actually fit on your phone. Remember – the bigger the sticker, the more ink and sticker paper you’ll need, and the higher your costs.
Where do you want to put your stickers – permanently outdoors on your car’s back window, on a bus stop, or somewhere else where countless people will see and appreciate your artistic efforts? Remember that the great outdoors are brutal to most inks. The sun’s UV rays love to fade most printed colors – especially red, which will fade the fastest, leaving skin tones looking kind of greenish. And don’t forget about rain, snow, heat, cold, and humidity. All those factors will affect both the colors on your sticker, as well as the adhesive that keeps your stickers stuck.
How do you want to use your stickers? Do you want to apply them as labels immediately, or do you plan to sell them at concerts or art shows? This is a decision that will determine how you want to cut your stickers.
Kiss Cut vs Die Cut
There are two types of cuts you can choose when creating stickers using the print and cut process. You’ll need to choose which one works best for the ultimate use or destination of your stickers. Are you using your stickers immediately for personal use, or do you plan to sell them or give them away at a later time?
Kiss cut is a lighter type of cutting process that only partially cuts through the material, leaving a thin layer of backing material intact. This makes it super easy to remove your stickers or labels from their backing. You’ll typically use kiss cut if you plan to use your stickers or labels immediately, or if you want to distribute stickers that are easier for your customers to peel.
Die cut is a type of cutting process that completely cuts through the sticker and the backing material, leaving a clean, finished edge. The edge might be a plain circle, square, or rectangle, or it may also be cut around the outline of your words or design, usually with an “offset” (a thin margin of white space for a more professional look). This is used for stickers you plan to save for later, or something you want to give away or sell. They may be a little tougher to remove from their backing if the backing isn’t scored.
Calibrating Your Cricut Joy Xtra
Making stickers is easy using the Cricut print then cut procedure. Using Cricut’s Design Space software, you can send your sticker creations to your inkjet printer, and then cut them into perfect shapes with or without an offset using your Cricut cutting machine. In order to get your Cricut Joy Xtra to print and cut correctly, you will first need to calibrate it using Cricut’s Design Space software. Don’t worry – the calibration process is almost automatic and fairly easy.
- Open the Cricut Design Space app and sign in to your account.
- Click the Menu button (☰) in the top left corner of the screen.
- Select Settings > Calibration.
- Select Print Then Cut.
- Select the printer that you will be using for Print Then Cut.
- Click Print.
- Follow the on-screen instructions to complete the calibration process.
Your Cricut Joy Xtra will pretty much destroy a sheet of paper or two as it scans your print and adjusts its cutting settings to memorize your printer’s capabilities. Once your Cricut Joy Xtra is calibrated with your printer, you should be able to print and cut your projects without any problems hopefully forever.
Here are some additional tips for calibrating your Cricut Joy Xtra:
- Make sure that your printer is properly aligned and that the ink cartridges are full.
- Use high-quality paper for your calibration sheet.
- Place the calibration sheet on the Cricut Joy Xtra mat so that it is centered and straight.
- Make sure that the Cricut Joy Xtra blade is sharp and clean.
If you are having problems calibrating your Cricut Joy Xtra, contact Cricut customer support for assistance. They’ll be happy to assist you.
Sticker Papers
People ask us, “What’s the best sticker paper?” It’s a difficult question to answer because of all the considerations we’ve already discussed. Some sticker papers are better for one application, and others do different things well. Let’s look at the pros and cons of a few different kinds of sticker paper.
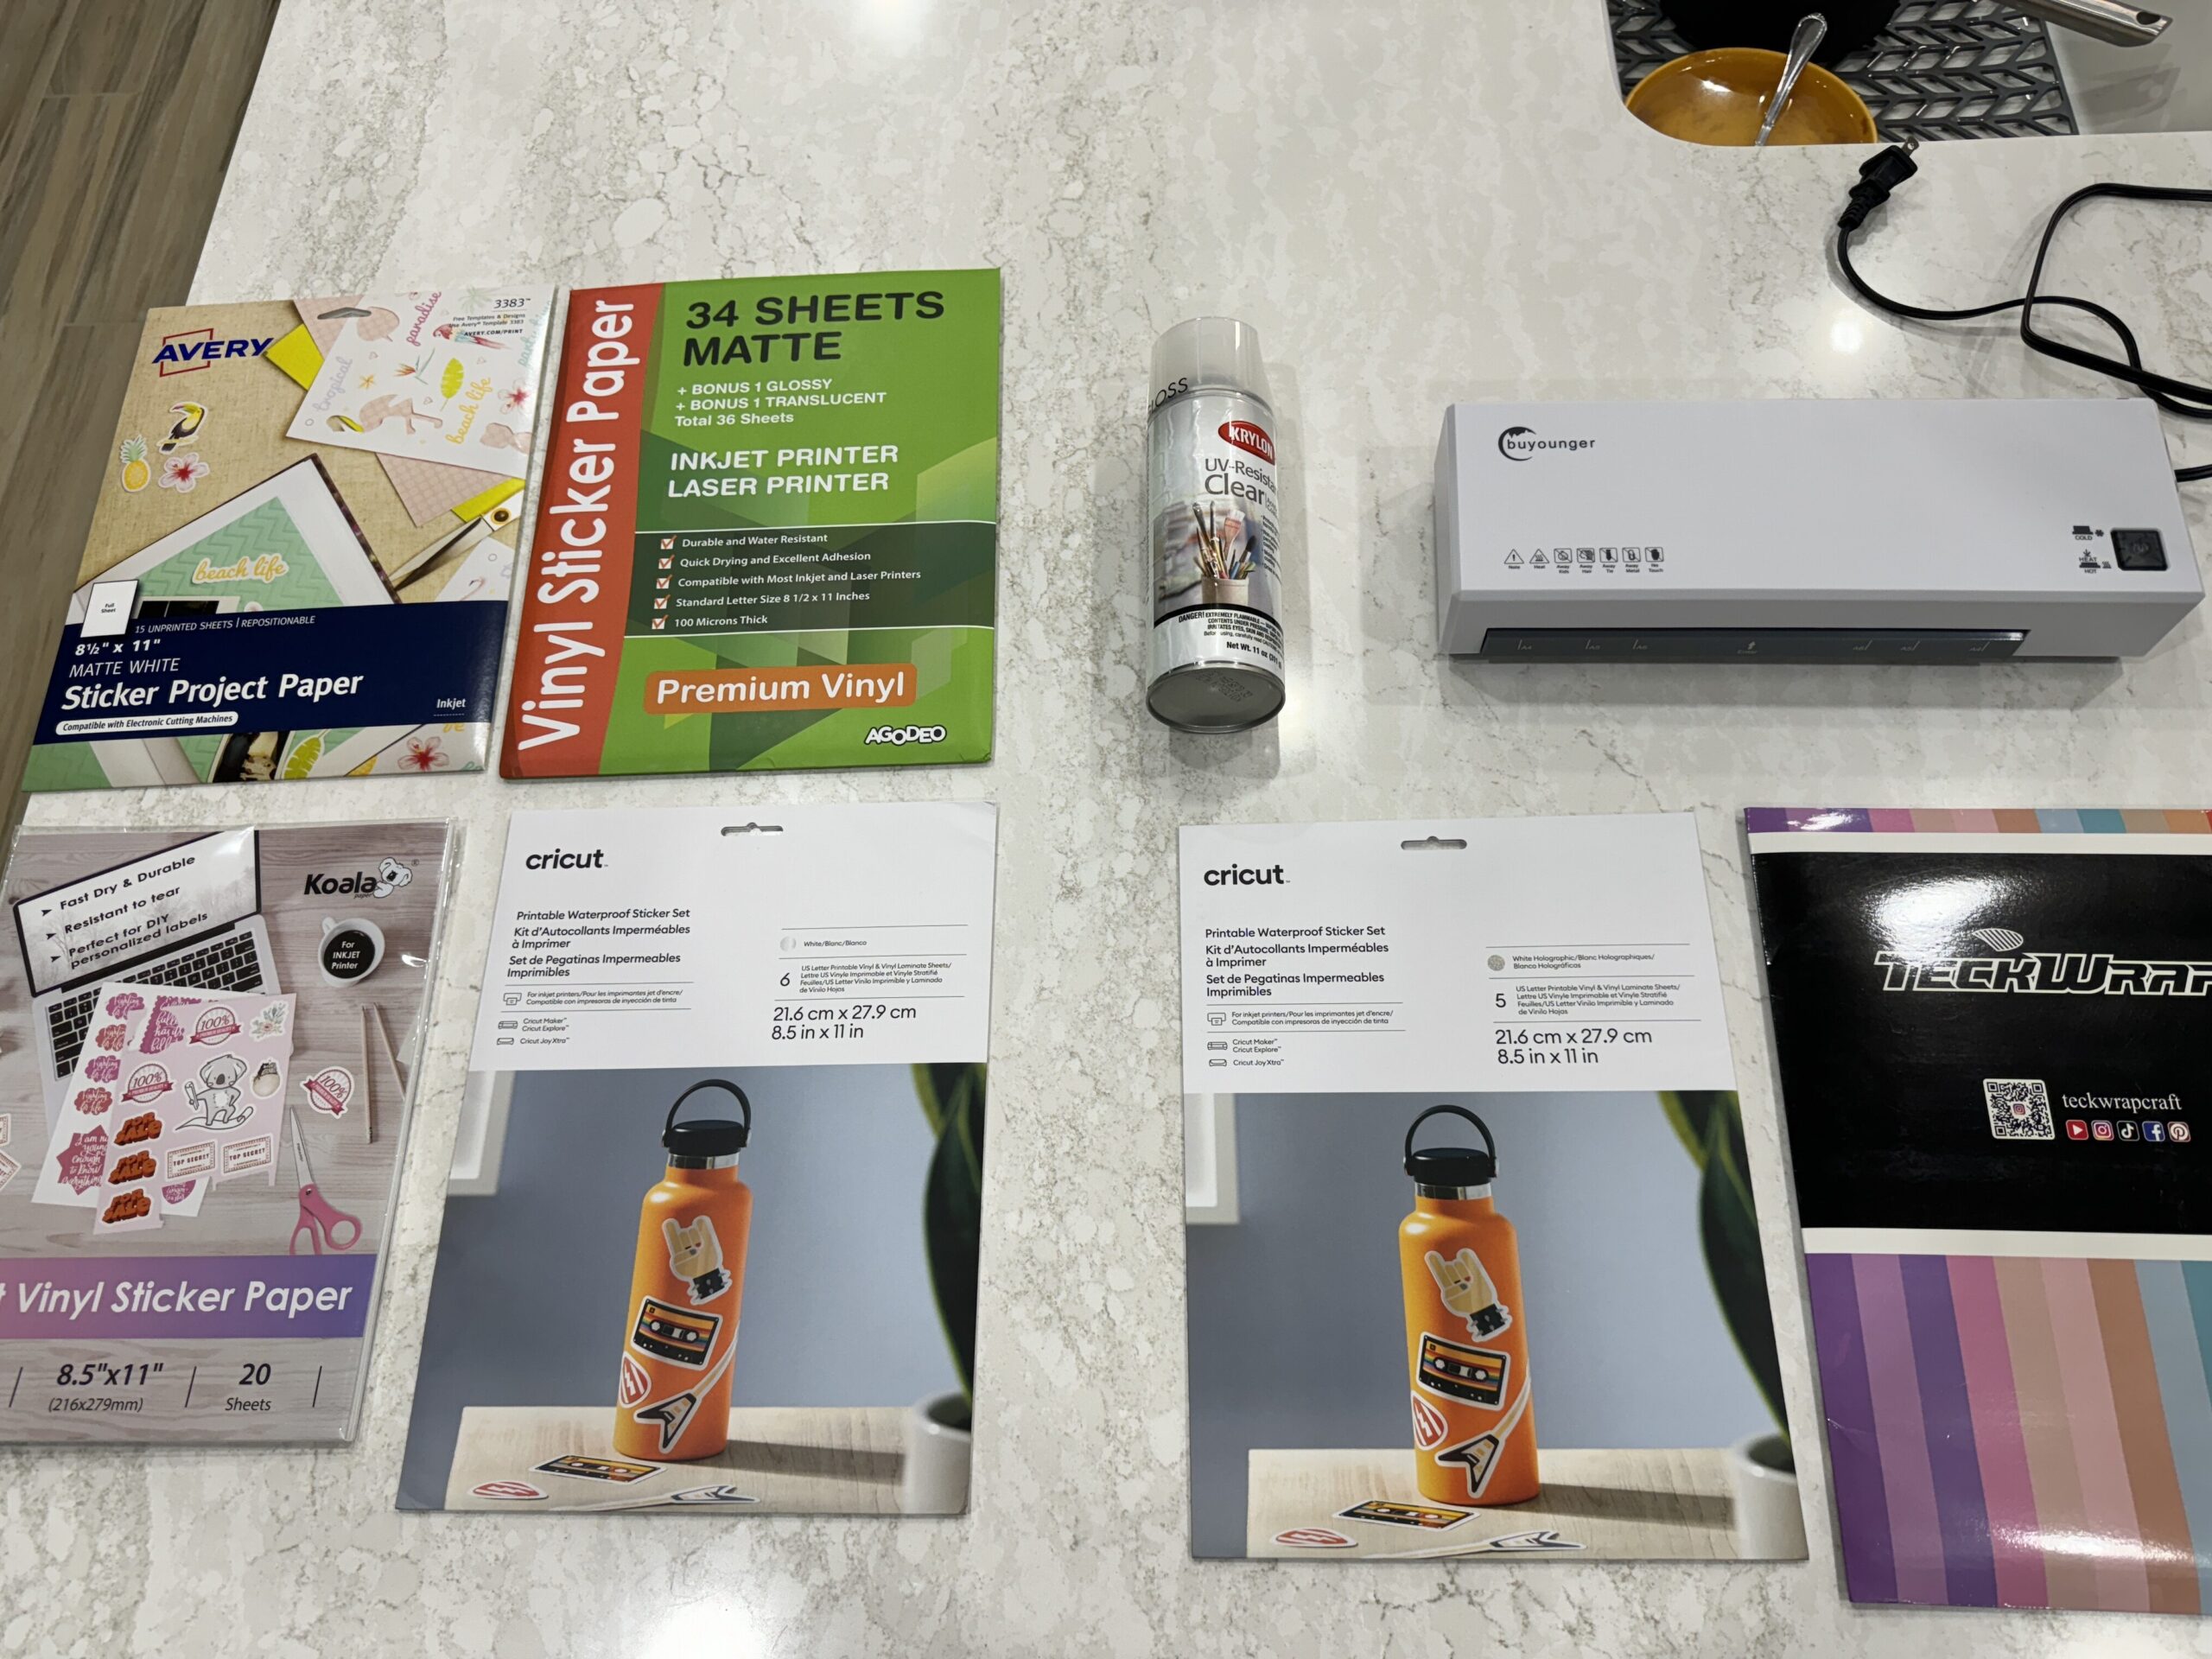
We tested many different types of sticker paper, and we really don’t have a single one size fits all recommendation. We can tell you that printable vinyl is less tear resistant, but the colors don’t seem to pop as well as they do on printable sticker paper. With that said, printable vinyl is a better choice for stickers that need to be durable and waterproof. Remember, the sticker material itself may be waterproof, but you might need to take some additional steps to make the printed ink waterproof. More on that later.
Printable vinyl is a plastic-like material that is coated with a backing adhesive. It is available in a variety of finishes including matte, glossy, holographic, and even metallic. Printable vinyl is also available in different thicknesses so you can choose the right one for your needs.
Printable sticker paper is a paper-based material that is coated with a backing adhesive. It is typically less expensive than printable vinyl, but it is also less durable and not waterproof.
When to use printable vinyl:
- For stickers that need to be durable and waterproof, such as outdoor stickers, car bumper stickers and laptop stickers.
- For stickers that need to be able to withstand a lot of wear and tear, such as stickers for smartphones, kids’ toys and water bottles.
- For stickers that need to have a professional finish, such as stickers for businesses and products.
When to use printable sticker paper:
- For temporary stickers, such as party favors and giveaways.
- For stickers that will be used indoors and in dry conditions such as stickers for scrapbooks and planners.
- For stickers that are on a budget.
We don’t recommend this, but in a pinch, there’s something called Double Sided Adhesive Sheets. You can take plain old printed paper and turn it into low quality stickers in a pinch. You probably can’t cut these in a Cricut, but stranger things have happened.
Ultimately, the best choice for your stickers will depend on your specific needs. If you need stickers that are durable and waterproof, printable vinyl covered with some sort of laminate is the best option. If you need temporary stickers or are on a budget, printable sticker paper may be a good choice for you.
How To Make Your Stickers Weatherproof – and People Proof
There are ways to make even cheap paper stickers waterproof and UV resistant. You can laminate stickers using a cold or hot laminate. Or, in a slightly more difficult application, you can carefully apply spray acrylic to your stickers.
When laminating, it is important to use the right type of laminate, and to apply it correctly. You’ll want to apply the laminate BEFORE sending your design through your Cricut Joy Xtra. Here are some tips for laminating stickers:
- Use a cold laminator if possible, as heat can affect the ink or adhesive with some types of stickers.
- Use a clear, waterproof laminate that is specifically designed for stickers.
- If you are laminating stickers that are made with printable vinyl, be sure to use a laminate that is compatible with vinyl.
- Peel off the backing from the laminate and carefully place it over the sticker.
- Smooth out the laminate with a squeegee or credit card to remove any air bubbles.
- Send your laminated print and cut design through your Cricut Joy Xtra.
- Allow the laminate to adhere completely before using the sticker.
Many people complain their stickers can’t survive the ‘scratch test,’ meaning that any time your sticker comes into contact with anything rigid, like your fingernails, a table, or even your jean pockets, part of the printing comes off. This is more common with stickers printed with pigment inks, because the microscopic color particles can be rubbed away. Applying a hot or cold laminate or acrylic coating to the top of your stickers will resolve scratching problems, and keep your stickers looking great for years to come.
Sticker and Decal Product Recommendations
✅ Materials used in this video (affiliate links):
➡ Cricut Joy Xtra – https://amzn.to/3tysb0s
➡ Teckwrap Vinyl – https://amzn.to/46t1SYb
➡ Cricut Standard Grip Mat – https://amzn.to/45rBzjT
➡ Epson Expression XP-4205 Printer – https://amzn.to/46MpoPC
➡ Cricut Weeding Tool – https://amzn.to/3FhCj09
➡ Cricut Transfer Tape – https://amzn.to/46QU3LO
➡ Cricut Waterproof Sticker Paper – https://amzn.to/3FiCCYA
➡ Premium Printable Vinyl Sticker Paper for Inkjet & Laser Printer – https://amzn.to/3S1Qo9O
✅ Need more crafting products?
👉 Visit Cricut’s Site for all things Cricut: https://cricut.pxf.io/QOaOBa
👉 Check out our Idea List for yourself or gift ideas: https://amzn.to/46jF0cX
👉 See What We’ve Made at Our Etsy Store! https://www.etsy.com/shop/FamilyUnitOriginals
👉 Some of our favorite vinyl is from Teckwrap: https://teckwrapcraftaffiliateprogram.sjv.io/Gmg2oE
✅ Subscribe to our YouTube channel! We appreciate every 👍 and would love it if you’d subscribe to our channel! It’s free! Subscribe here
➡ https://www.youtube.com/@FamilyUnit?sub_confirmation=1
✅ Let’s Connect!
😎 Instagram ➡ https://www.instagram.com/familyunit_on_youtube
😎 Facebook ➡ https://www.facebook.com/ourfamilyunit
😎 TikTok ➡ https://www.tiktok.com/@familyunit_on_youtube
😎 For all inquiries ➡ hello @ freshandfelicia.com
🎞️ More Helpful How-To Videos
✓ How to Use a Cricut Maker – https://www.youtube.com/watch?v=F0qzvg_xf9c
✓ Brother Scan n Cut SDX125 Review – https://youtu.be/yrSbRe35tpw?si=VgMuh6rkL3MrJ8hk
✓ Brother SE1900 Sewing and Embroidery Machine – https://youtu.be/Q6RtRZLcJ7o?si=kVjso_xRdHcD_aSB
❇ Disclosure
Links included in this description and comments include affiliate links. If you purchase a product or service with the links that we provide we may receive a small commission that helps us pay our bills. Don’t worry – there is no additional charge to you. Thank you for supporting our channel so we can continue to provide you with free content.
©2023 Fresh and Felicia. All rights reserved. Copying or duplication of this content in any means in any media without express written permission is strictly prohibited.


Hello
I love your channel!! You explain your projects and go
Slowly which is very easy to follow and since I am a newbie It is much appreciated!!
Can you show how to add text to a sticker sometime in the future… I haven’t experienced doing this yet
Have a great day
Hi Katharine! That is a great question. We briefly breezed over it on this video at around 22:34
https://youtu.be/IGmhGpqrqXs?si=5f22PlW1Xgnp9SWL
But I’m sure a lot of people have the same question so we will make a video featuring just that. Thanks so much for your suggestion!